使用 HTML、CSS 和 JavaScript 上传带有预览的图像
本指南将教您如何设置图像上传器并使用纯 HTML、CSS 和 JavaScript 在屏幕上显示预览。
项目设置
在您的计算机上创建一个目录(例如 file-upload)并在其中创建一个三个文件:
- 索引.html
- 样式.css
- 脚本.js
HTML模板
从 HTML 开始,我们将创建一个基本模板并将其与另外两个文件链接起来:
<!DOCTYPE html>
<html lang="en">
  <head>
    <meta charset="UTF-8" />
    <meta http-equiv="X-UA-Compatible" content="IE=edge" />
    <meta name="viewport" content="width=device-width, initial-scale=1.0" />
    <!-- Font awesome for fa icons -->
    <script src="https://use.fontawesome.com/fe459689b4.js"></script>
    <!-- Including styles.css file -->
    <link rel="stylesheet" type="text/css" href="./styles.css" />
    <title>File upload with preview</title>
  </head>
  <body>

    <!-- Including scripts.js file -->
    <script src="./scripts.js"></script>
  </body>
</html>
我还添加了用于 UI/UX 的Font Awesome图标脚本。
设置文件上传器
现在我们在两个<body></body>标签内添加文件上传的HTML代码:
    <div class="profile-picture">
      <h1 class="upload-icon">
        <i class="fa fa-plus fa-2x" aria-hidden="true"></i>
      </h1>
      <input
        class="file-uploader"
        type="file"
        onchange="upload()"
        accept="image/*"
      />
    </div>
- 这
<div class="profile-picture">是我们与用户交互的主要容器,它将作为上传图像的显示。 - 这
<h1 class="upload-icon">是出现在图像上方的图标的标题。
窥视输入
- 输入
type="file"就是告诉 HTML 将此输入从其默认行为(文本框)更改为可以从您的机器上传文件的按钮。 - 这
onchange="upload()"是onchange元素上的一个事件,当选择文件时会触发该事件并调用upload()我们在 JavaScript 文件中创建的函数。 - 该
accept="image/*"标签指示应用程序在浏览计算机上的文件时仅查找图像类型的文件。其他文件类型不会出现在窗口中。
上传器样式
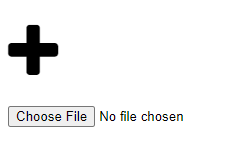
默认 HTML 元素的缺点<input/>是样式选项有限。为了让文件上传按钮看起来像封面图片中的按钮,我们将<input/>用<div class="profile-picture">遮盖住它。
应用程序用户将通过点击 与上传输入进行交互<div class="profile-picture">。为此,我们将为容器指定一个 样式position: relative,而<h1>标签和<input/>标签将具有 样式position: absolute。
在文件中styles.css,我们将为每个元素设置样式。
个人资料图片容器样式
.profile-picture {
  opacity: 0.75;
  height: 250px;
  width: 250px;
  position: relative;
  overflow: hidden;

  /* default image */
  background: url('https://qph.cf2.quoracdn.net/main-qimg-f32f85d21d59a5540948c3bfbce52e68');

  background-position: center;
  background-repeat: no-repeat;
  background-size: cover;
  box-shadow: 0 8px 6px -6px black;
}
文件上传器输入样式
.file-uploader {
  /* make it invisible */
  opacity: 0;
  /* make it take the full height and width of the parent container */
  height: 100%;
  width: 100%;
  cursor: pointer;
  /* make it absolute */
  position: absolute;
  top: 0%;
  left: 0%;
}
上传图标标题样式
我们将 Font Awesome 图标放置在容器的中间,并默认使其不可见。
.upload-icon {
  position: absolute;
  top: 45%;
  left: 50%;
  transform: translate(-50%, -50%);
  /* initial icon state */
  opacity: 0;
  transition: opacity 0.3s ease;
  color: #ccc;
  -webkit-text-stroke-width: 2px;
  -webkit-text-stroke-color: #bbb;
}
仅当用户将鼠标悬停在容器上时,图标才会出现:
/* toggle icon state */
.profile-picture:hover .upload-icon {
  opacity: 1;
}
看起来好多了!现在开始添加功能。
编写上传脚本
在这个script.js文件中,我们将创建一个upload()由事件触发的函数。我们将从HTML 元素中<input onchange="upload">获取图像:<input class="file-uploader"
function upload() {

  const fileUploadInput = document.querySelector('.file-uploader');
我们还可以根据所选的文件类型、文件大小等验证输入。
  const fileUploadInput = document.querySelector('.file-uploader');

  // using index [0] to take the first file from the array
  const image = fileUploadInput.files[0];

  // check if the file selected is not an image file
  if (!image.type.includes('image')) {
    return alert('Only images are allowed!');
  }

  // check if size (in bytes) exceeds 10 MB
  if (image.size > 10_000_000) {
    return alert('Maximum upload size is 10MB!');
  }
最后,我们将利用内置类FileReader将我们上传的文件(Blob 格式)转换为代表图像的 base64 编码数据 URL。
  const fileReader = new FileReader();
  fileReader.readAsDataURL(image);
当fileReaderBlob 图像处理完成后,它将触发onload实例上的事件。在内部,我们将使用 base-64 URL 作为容器的背景图像:
  const fileReader = new FileReader();
  fileReader.readAsDataURL(image);

  fileReader.onload = (fileReaderEvent) => {
    const profilePicture = document.querySelector('.profile-picture');
    profilePicture.style.backgroundImage = `url(${fileReaderEvent.target.result})`;
  }
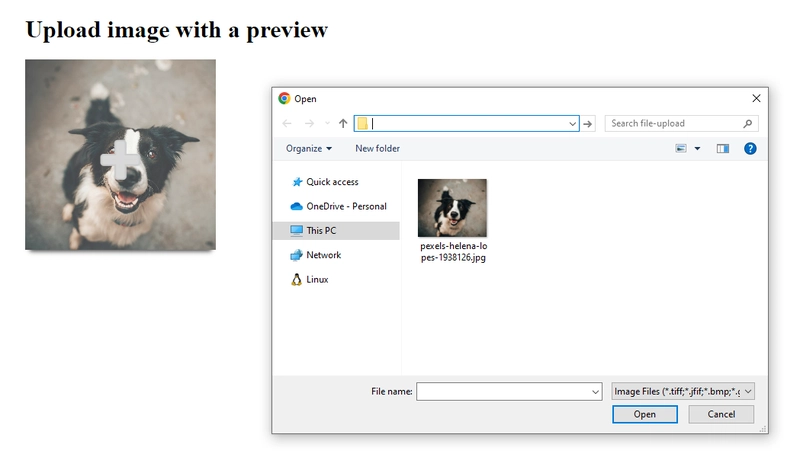
演示
Pexels上的 Helena Lopes 拍摄的照片
下一个合乎逻辑的步骤是将博客图像上传到云端,例如 Cloudinary 或 AWS S3 存储桶,这超出了本文的讨论范围。
您可以在Github上找到完整的代码。
如需更多精彩内容,请访问我的Medium博客,并在Twitter上关注我。
 后端开发教程 - Java、Spring Boot 实战 - msg200.com


