使用 Next.js、Resend 和 Trigger.dev 构建后台电子邮件通知
您将在本文中发现什么?
电子邮件通知是让用户随时了解应用程序操作的最常用方式。典型的通知包括:有人关注你、有人点赞你的帖子、有人浏览了你的内容。在本文中,我们将探讨如何使用 Next.js、Resend 和 Trigger.dev 创建一个简单的异步电子邮件通知系统。
我们将使用 Next.js 作为框架来构建我们的应用程序。我们将使用 Resend 发送电子邮件,并使用 Trigger.dev 来异步卸载和发送电子邮件。

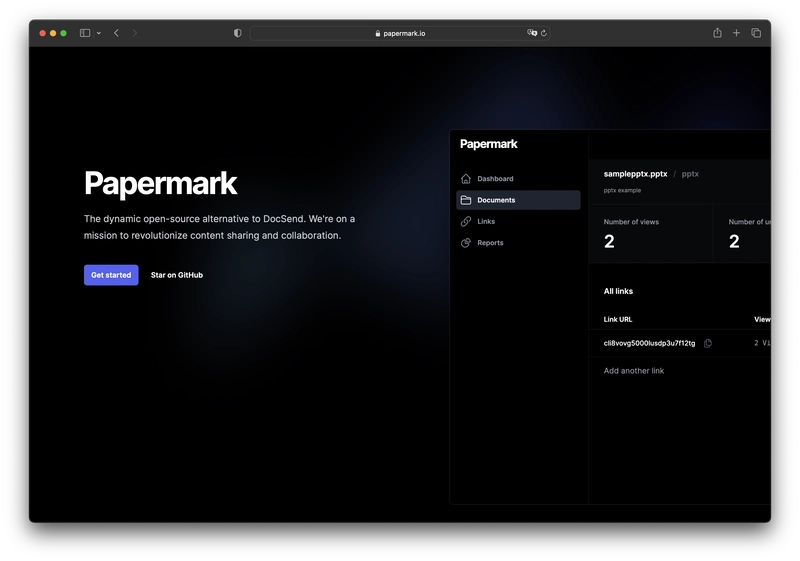
Papermark - 开源的 DocSend 替代品。
在开始之前,我想先跟大家分享一下 Papermark。它是 DocSend 的开源替代品,可以帮助你安全地共享文档,并实时获取浏览者的逐页分析数据。它完全开源!
如果你能给我们一颗星,我会非常高兴!别忘了在评论区分享你的想法❤️
https://github.com/mfts/papermark
设置项目
让我们继续为电子邮件后台通知系统设置项目环境。我们将创建一个 Next.js 应用,并设置“重新发送”以及最重要的“触发器”来处理异步电子邮件通知。
使用 TypeScript 和 Tailwindcss 设置 Next.js
我们将使用它create-next-app来生成一个新的 Next.js 项目。我们还将使用 TypeScript 和 Tailwind CSS,因此请确保在出现提示时选择这些选项。
npx create-next-app

# ---
# you'll be asked the following prompts
What is your project named?  my-app
Would you like to add TypeScript with this project?  Y/N
# select `Y` for typescript
Would you like to use ESLint with this project?  Y/N
# select `Y` for ESLint
Would you like to use Tailwind CSS with this project? Y/N
# select `Y` for Tailwind CSS
Would you like to use the `src/ directory` with this project? Y/N
# select `N` for `src/` directory
What import alias would you like configured? `@/*`
# enter `@/*` for import alias
安装 Resend 和 React-Email
Resend 是一款面向开发者的事务性电子邮件服务。我们将使用它向用户发送电子邮件。Resendreact-email是一个 React 组件库,可轻松创建精美的电子邮件。
npm install resend react-email
安装触发器
Trigger 是一个 TypeScript 的后台作业框架。它允许你将长时间运行的任务从主应用程序中卸载,并异步运行它们。我们将使用它来异步发送电子邮件。
Trigger CLI 是在新的或现有的 Next.js 项目中设置 Trigger 的最简单方法。有关更多信息,请查看其文档。
npx @trigger.dev/cli@latest init
构建应用程序
现在我们已经完成了设置,可以开始构建应用程序了。我们将介绍的主要功能包括:
- 设置重新发送电子邮件
- 编写 API 路由来发送电子邮件
- 添加触发器作业以使电子邮件发送异步
#1 设置重新发送电子邮件
首先,我们需要设置 Resend 来发送电子邮件。我们将resend-notification.ts在项目中创建一个新文件并添加以下代码。
// lib/emails/resend-notification.ts
import { Resend } from "resend";
import { NotificationEmail } from "@/components/emails/notification";

const resend = new Resend(process.env.RESEND_API_KEY!);

export async function sendNotificationEmail({
  name,
  email,
}: {
  name: string | null | undefined;
  email: string | null | undefined;
}) {
  const emailTemplate = NotificationEmail({ name });
  try {
    // Send the email using the Resend API
    await resend.emails.send({
      from: "Marc from Papermark <marc@example.org>",
      to: email as string,
      subject: "You have a new view on your document!",
      react: emailTemplate,
    });
  } catch (error) {
    // Log any errors and re-throw the error
    console.log({ error });
    throw error;
  }
}
使用的通知电子邮件模板react-email将如下所示:
// components/emails/notification.tsx
import React from "react";
import {
  Body,
  Button,
  Container,
  Head,
  Heading,
  Html,
  Preview,
  Section,
  Text,
  Tailwind,
} from "@react-email/components";

export default function ViewedDocument({
  name,
}: {
  name: string | null | undefined;
}) {
  return (
    <Html>
      <Head />
      <Preview>See who visited your document</Preview>
      <Tailwind>
        <Body className="bg-white my-auto mx-auto font-sans">
          <Container className="my-10 mx-auto p-5 w-[465px]">
            <Heading className="text-2xl font-normal text-center p-0 mt-4 mb-8 mx-0">
              <span className="font-bold tracking-tighter">Papermark</span>
            </Heading>
            <Heading className="mx-0 my-7 p-0 text-center text-xl font-semibold text-black">
              New Document Visitor
            </Heading>
            <Text className="text-sm leading-6 text-black">
              Your document was just viewed by someone.
            </Text>
            <Text className="text-sm leading-6 text-black">
              You can get the detailed engagement insights like time-spent per
              page and total duration for this document on Papermark.
            </Text>
            <Section className="my-8 text-center">
              <Button
                className="bg-black rounded text-white text-xs font-semibold no-underline text-center"
                href={`${process.env.NEXT_PUBLIC_BASE_URL}/documents`}
                style={{ padding: "12px 20px" }}>
                See my document insights
              </Button>
            </Section>
            <Text className="text-sm">
              Cheers,
              <br />
              The Papermark Team
            </Text>
          </Container>
        </Body>
      </Tailwind>
    </Html>
  );
}
#2 编写一个 API 路由来发送电子邮件
现在,我们的电子邮件模板已经准备就绪。我们可以用它向用户发送电子邮件。我们将创建一个无服务器函数,该函数接收用户的name“和” ,并使用我们之前创建的函数向用户发送电子邮件。emailsendNotificationEmail
// pages/api/send-notification.ts
import { NextApiRequest, NextApiResponse } from "next";
import prisma from "@/lib/prisma";
import { sendViewedDocumentEmail } from "@/lib/emails/resend-notification";

export const config = {
  maxDuration: 60,
};

export default async function handle(
  req: NextApiRequest,
  res: NextApiResponse
) {
  // We only allow POST requests
  if (req.method !== "POST") {
    res.status(405).json({ message: "Method Not Allowed" });
    return;
  }

  // POST /api/send-notification
  try {
    const { viewId } = req.body as {
      viewId: string;
    };

    // Fetch the link to verify the settings
    const view = await prisma.view.findUnique({
      where: {
        id: viewId,
      },
      select: {
        document: {
          select: {
            owner: {
              select: {
                email: true,
                name: true,
              },
            },
          },
        },
      },
    });

    if (!view) {
      res.status(404).json({ message: "View / Document not found." });
      return;
    }

    // send email to document owner that document
    await sendViewedDocumentEmail({
      email: view.document.owner.email as string,
      name: view.document.owner.name as string,
    });

    res.status(200).json({ message: "Successfully sent notification", viewId });
    return;
  } catch (error) {
    console.log("Error:", error);
    return res.status(500).json({ message: (error as Error).message });
  }
}
#3 添加触发器作业以使电子邮件发送异步
我们的邮件发送功能已经完成,但我们不想同步发送邮件,因此需要等到邮件发送完成后再让应用程序响应用户。我们希望将邮件发送任务转移到后台执行。我们将使用 Trigger 来实现这一点。
在设置过程中,Trigger CLIjobs在我们的项目中创建了一个目录。我们将notification-job.ts在该目录中创建一个新文件并添加以下代码。
// jobs/notification-job.ts
import { client } from "@/trigger";
import { eventTrigger, retry } from "@trigger.dev/sdk";
import { z } from "zod";

client.defineJob({
  id: "send-notification",
  name: "Send Notification",
  version: "0.0.1",
  trigger: eventTrigger({
    name: "link.viewed",
    schema: z.object({
      viewId: z.string(),
    }),
  }),
  run: async (payload, io, ctx) => {
    const { viewId } = payload;

    // get file url from document version
    const notification = await io.runTask(
      "send-notification",
      async () => {
        const response = await fetch(
          `${process.env.NEXT_PUBLIC_BASE_URL}/api/send-notification`,
          {
            method: "POST",
            body: JSON.stringify({ viewId }),
            headers: {
              "Content-Type": "application/json",
            },
          }
        );

        if (!response.ok) {
          await io.logger.error("Failed to send notification", { payload });
          return;
        }

        const { message } = (await response.json()) as {
          message: string;
        };

        await io.logger.info("Notification sent", { message, payload });
        return { message };
      },
      { retry: retry.standardBackoff }
    );

    return {
      success: true,
      message: "Successfully sent notification",
    };
  },
});
向作业索引文件添加导出功能,否则 Trigger 将无法识别该作业。虽然这只是一个小细节,但我甚至都忘了这一点,并且花了整整一个小时来查找错误信息。
// jobs/index.ts
export * from "./notification-job";
奖励:防止恶意访问 API 路由
我们已经准备好 API 路由,但我们不想允许任何人访问它。我们希望确保只有我们的应用程序可以访问它。我们将使用一个简单的标头身份验证密钥来实现这一点。
在触发作业中,我们将向请求添加标头:
// jobs/notification-job.ts
..
...
const response = await fetch(
  `${process.env.NEXT_PUBLIC_BASE_URL}/api/jobs/send-notification`,
  {
    method: "POST",
    body: JSON.stringify({ viewId }),
    headers: {
      "Content-Type": "application/json",
      Authorization: `Bearer ${process.env.INTERNAL_API_KEY}`, // <- add the authenication header with a local env variable
    },
  },
);
...
..
在 API 路由中,我们将检查 API 密钥是否在try {} catch {}块之前匹配:
// pages/api/send-notification.ts
..
...
// Extract the API Key from the Authorization header
const authHeader = req.headers.authorization;
const token = authHeader?.split(" ")[1]; // Assuming the format is "Bearer [token]"

// Check if the API Key matches
if (token !== process.env.INTERNAL_API_KEY) {
  res.status(401).json({ message: "Unauthorized" });
  return;
}
...
..
确保将其添加INTERNAL_API_KEY到您的.env文件中。
# .env
INTERNAL_API_KEY="YOUR_API_KEY"
结论
瞧!我们的异步邮件通知系统已经准备就绪。现在我们可以异步向用户发送电子邮件,而不会影响用户的等待时间。我们还可以使用 Trigger 从主应用程序中卸载许多其他我们不想让用户等待的任务。
感谢您的阅读。我是 Marc,一位开源倡导者。我正在构建papermark.com ——DocSend 的开源替代方案。
继续编码!
帮帮我!
如果您觉得这篇文章对您有帮助,并且对触发器和后台任务有了更深入的理解,请给我们一颗星,我会非常高兴!别忘了在评论区分享您的想法哦 ❤️
https://github.com/mfts/papermark