使用自定义 usePagination() 钩子在 Javascript 和 React 中进行分页
本指南旨在帮助您了解分页的概念以及如何在 React 中实现它,本教程中的概念可应用于任何 javascript 项目。
🤨什么是分页?
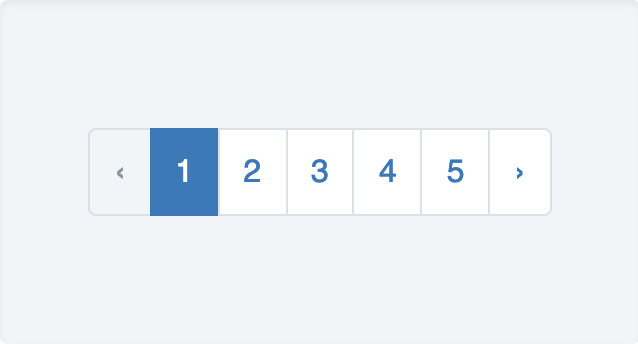
分页是将印刷或数字内容分成独立页面的过程。对于印刷文档和一些在线内容,分页也指自动添加连续数字以标识页面顺序的过程。
背后的概念?💻
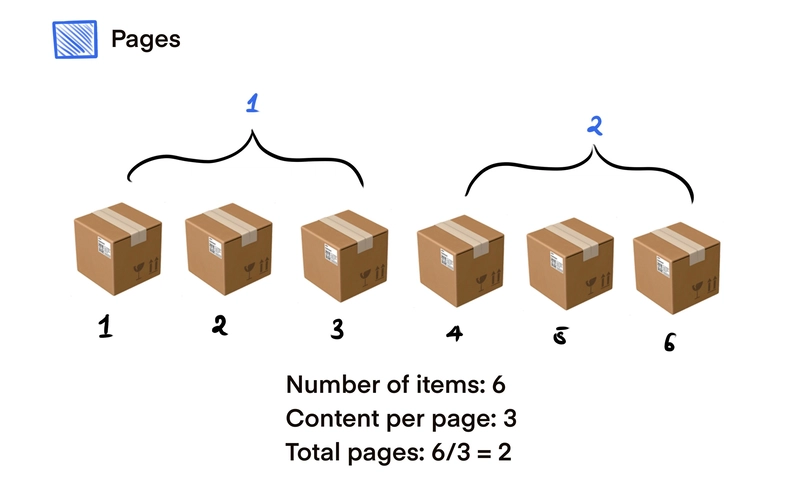
假设一页共有 6 个项目,而您希望每次只显示 3 个项目(每页)。这意味着我们总共会有 2 页,如果我们想每页显示 2 个项目,那么总共……你猜对了!就是 3 页。
这个公式相当简单:totalPages = totalContent / contentPerPage
在 Javascript 中实现 (.slice()) 🔪
计算每页的内容相当容易,但如何根据当前页面显示特定内容呢?我们只需要了解页面和index内容之间的关系。首先让我们了解一下.slice()Array 方法。
slice() 方法将数组的一部分内容浅拷贝至一个新数组对象,该新数组对象从起始位置到结束位置(不包括结束位置),起始位置和结束位置代表数组中元素的索引。原始数组不会被修改。
例如,假设我们有一个名为的数组scouts,我们想根据数组的索引仅选择该数组的一部分。
const scouts = ["levi", "hange", "erwin", "petra", "oruo", "miche"]
scouts.slice(2, 5)
// output: [ 'erwin', 'petra', 'oruo' ]
scouts.slice(1, 3)
// output: [ 'hange', 'erwin' ]
我们都知道 javascript 遵循从零开始的索引,因此第一个参数是我们要开始切片的索引,第二个参数是我们希望切片结束之后的索引。例如,如果我们想要 2 到 4,我们使用.slice(2, 5)如第一个示例中所示。
将页码映射到索引
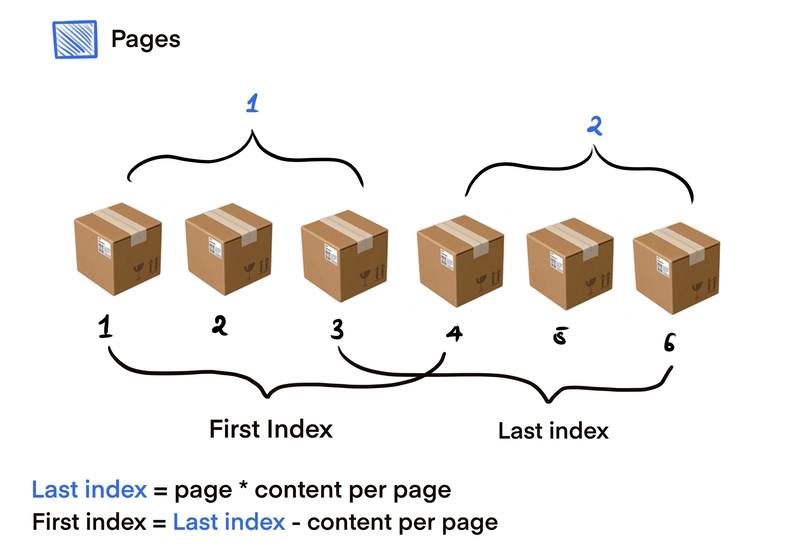
我们需要做的就是知道startIndex和lastIndex应该基于页码。这种关系很简单。
从上图可以看出,最后一个索引只是当前页面乘以给定的页面内容,而第一个索引是从最后一个索引中减去页面内容。
// assuming we are on page one
const page = 1;
const contentPerPage = 3
const lastIndex = page * contentPerPage // 3
const firstIndex = lastIndex - contentPerPage // 0

scouts.slice(firstIndex, lastIndex)
// scouts.slice(0, 3) => [ 'levi', 'hange', 'erwin' ]

// page 2
// scouts.slice(3, 6) => [ 'petra', 'oruo', 'miche' ]
哇!这很容易😳。
自定义usePagination钩子🎣
现在我们已经了解了它背后的概念,让我们在 React 中实现它,并创建自定义钩子来帮助我们自动化这个过程。
这个钩子接收一个对象,该对象包含以下属性contentPerPage:一次应显示的项目数以及count给定的项目总数(数组长度)。它还返回一个具有以下属性的对象。
page- 我们当前所在的页面totalPages- 生成的页面总数firstContentIndex-.slice()方法的第一个索引lastContentIndex-.slice()方法的最后一个索引nextPage- 向前导航一页的功能prevPage- 向后导航一页的功能setPage- 转到特定页面的功能
类型定义如下:
interface UsePaginationProps {
    contentPerPage: number,
    count: number,
}

interface UsePaginationReturn {
    page: number;
    totalPages: number;
    firstContentIndex: number;
    lastContentIndex: number;
    nextPage: () => void;
    prevPage: () => void;
    setPage: (page: number) => void;
}

type UsePagination = (UsePaginationProps) => (UsePaginationReturn);
在您的 React 项目中创建一个名为的文件夹hooks并创建一个名为的文件usePagination,这就是我们的自定义钩子所在的位置。
在其中输入以下内容
import { useState } from "react";

const usePagination: UsePagination = ({ contentPerPage, count }) => {
  const [page, setPage] = useState(1);
  // number of pages in total (total items / content on each page)
  const pageCount = Math.ceil(count / contentPerPage);
  // index of last item of current page
  const lastContentIndex = page * contentPerPage;
  // index of first item of current page
  const firstContentIndex = lastContentIndex - contentPerPage;

  // change page based on direction either front or back
  const changePage = (direction: boolean) => {
    setPage((state) => {
      // move forward
      if (direction) {
        // if page is the last page, do nothing
        if (state === pageCount) {
          return state;
        }
        return state + 1;
        // go back
      } else {
        // if page is the first page, do nothing
        if (state === 1) {
          return state;
        }
        return state - 1;
      }
    });
  };

  const setPageSAFE = (num: number) => {
    // if number is greater than number of pages, set to last page
    if (num > pageCount) {
      setPage(pageCount);
      // if number is less than 1, set page to first page
    } else if (num < 1) {
      setPage(1);
    } else {
      setPage(num);
    }
  };

  return {
    totalPages: pageCount,
    nextPage: () => changePage(true),
    prevPage: () => changePage(false),
    setPage: setPageSAFE,
    firstContentIndex,
    lastContentIndex,
    page,
  };
};

export default usePagination;
我们用 来管理当前页面的值useState,同时注意到pageCount也等于上一页的值。我已尽可能清晰地解释了上面的代码。
实施✍🏾
我们只需导入钩子然后输入所需的属性。
...
  const {
    firstContentIndex,
    lastContentIndex,
    nextPage,
    prevPage,
    page,
    setPage,
    totalPages,
  } = usePagination({
    contentPerPage: 3,
    count: people.length,
  });
...
然后我们简单地用和来切分我们的数据。firstContentIndexlastContentIndex
...
<div className="items">
  {people
    .slice(firstContentIndex, lastContentIndex)
    .map((el: any) => (
      <div className="item" key={el.uid}></div>
   ))}
</div>
...
下面是一个简单的功能,可以帮助我们生成按钮,然后添加它们相应的onClick处理程序。
<div className="pagination">
<p className="text">
{page}/{totalPages}
</p>
<button onClick={prevPage} className="page">
←
</button>
{/* @ts-ignore */}
{[...Array(totalPages).keys()].map((el) => (
<button
onClick={() => setPage(el + 1)}
key={el}
className={`page ${page === el + 1 ? "active" : ""}`}
>
{el + 1}
</button>
))}
<button onClick={nextPage} className="page">
→
</button>
</div>
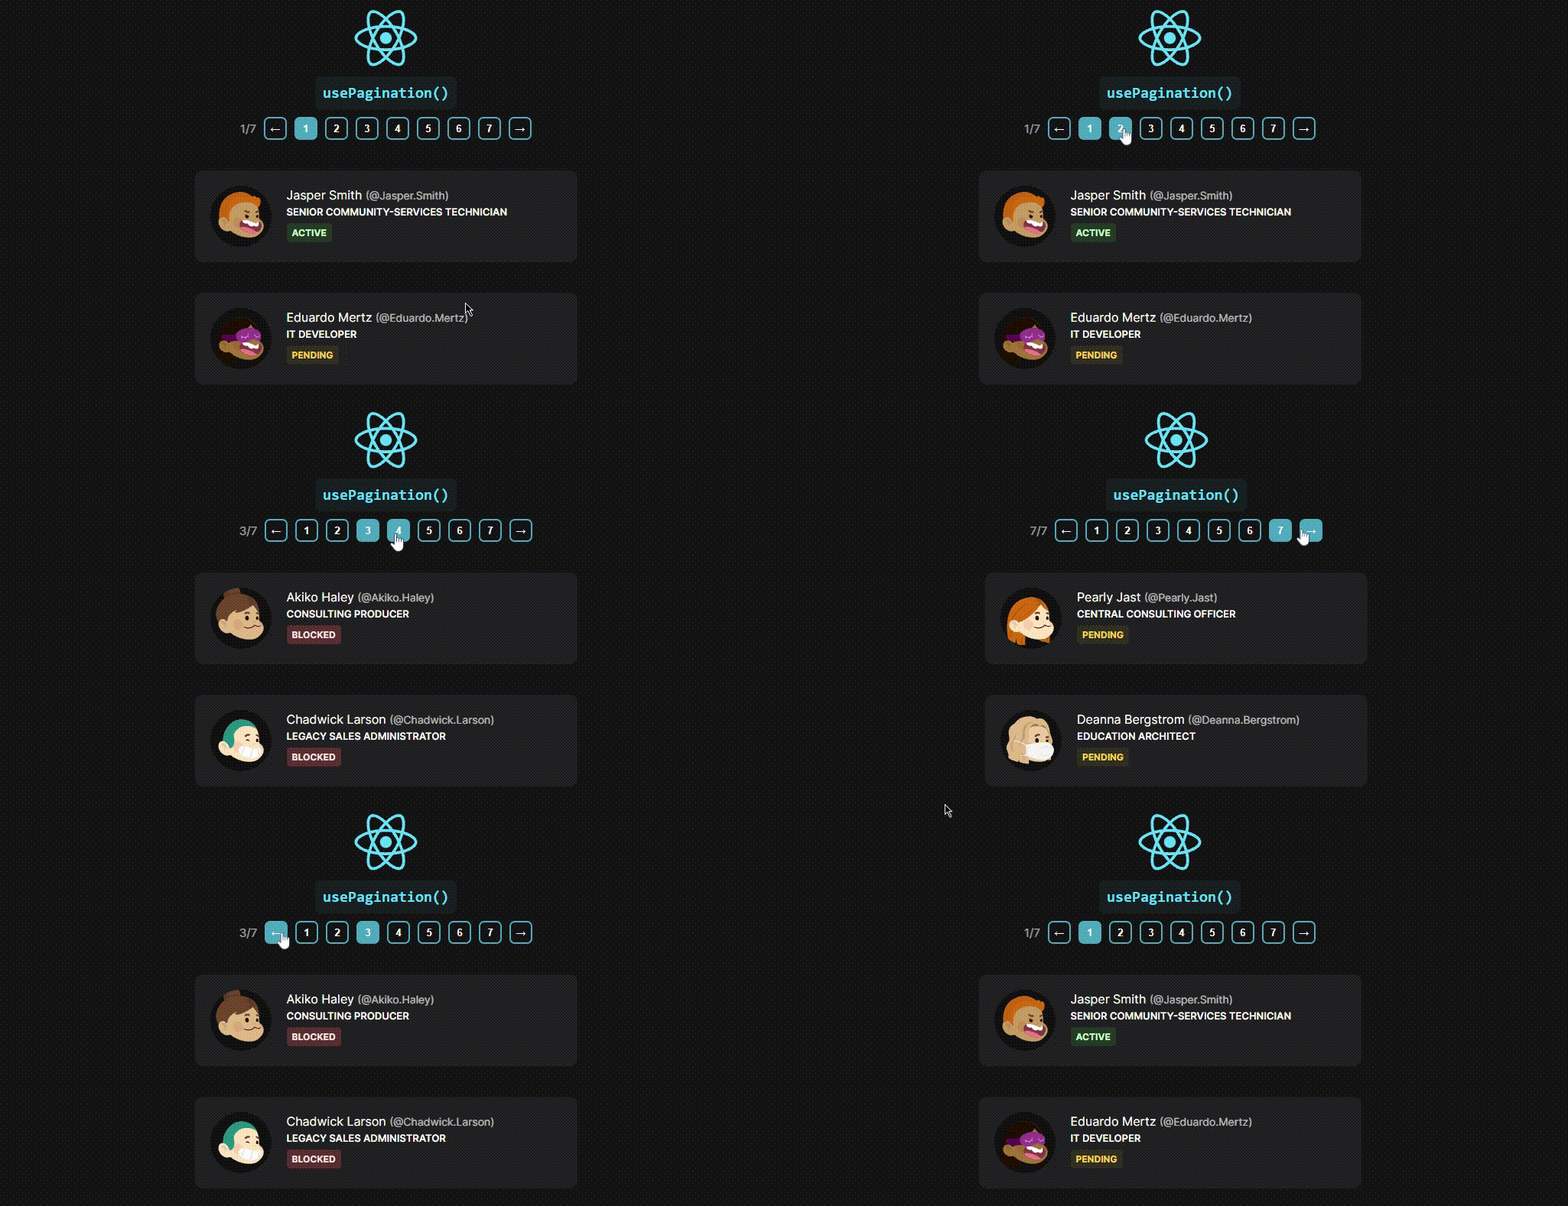
大功告成!正如你下面看到的,我们的usePagination钩子按计划完成了工作。
感谢您的阅读🙏🏾,如果您有任何问题、补充或删减,请在下面评论。
完整的源代码链接如下👇👇
 后端开发教程 - Java、Spring Boot 实战 - msg200.com


