使用 Next.js 和 OpenAI🧙✨ 构建 AI 驱动的测验应用程序
在本教程中,您将学习如何构建一个由人工智能驱动的测验应用程序,该应用程序使用户能够选择一个主题,回答与该主题相关的问题,并在完成测验后立即获得他们的分数。
此测验的问题将使用 OpenAI API 动态生成,通过提供特定的提示,并以所需的 JSON 格式返回问题。在构建此应用程序的过程中,您还将学习如何将 OpenAI 与您的软件应用程序集成。

Latitude 是什么?
Latitude AI 是一个开源的快速工程平台,可让您轻松构建、测试和部署由大型语言模型 (LLM) 支持的功能。该平台使团队能够创建功能强大且智能的 AI 应用程序。
您可以通过加入我们的候补名单,了解更多关于 Latitude AI 的信息。欢迎随时与团队联系,了解我们如何利用 AI 解决各种挑战。

使用 Next.js 构建测验应用程序
在本节中,您将学习如何构建测验应用程序的界面。该应用程序分为三个页面:Home Page、Test Page和Score Page。
首页显示所有可用的主题。测试页面会呈现一道题目,并提供一系列选项供用户选择正确答案。最后,分数页面会显示用户的分数。
通过运行以下代码片段创建一个新的 Next.js Typescript 项目:
npx create-next-app ai-quiz-app
types.d.ts在项目根目录中添加一个文件来定义应用程序测验问题的数据结构。
interface Question {
    question: string;
    options: string[];
    answer: string;
    id: number;
}
接下来,在 Next.js 文件夹中创建一个lib包含文件的文件夹:util.tsapp
//👇🏻 topics list
export const firstTopics = [
    { id: "AI", name: "AI Questions" },
    { id: "Python", name: "Python Questions" },
    { id: "JavaScript", name: "JavaScript Questions" },
];

//👇🏻 topics list
export const secondTopics = [
    { id: "CSS", name: "CSS Questions" },
    { id: "HTML", name: "HTML Questions" },
    { id: "UI Design", name: "UI Design Questions" },
];
//👇🏻 capitalize the first letter of each word
export const capitalize = (str: string): string => {
    str = str.replace(/%20/g, " ");
    if (str.length === 0) {
        return str;
    }
    return str.charAt(0).toUpperCase() + str.slice(1) + " Questions";
};
数组包含应用程序内可用的主题列表,并且firstTopics函数接受字符串作为其参数并将句子的首字母大写。secondTopicscapitalize
主页
将下面的代码片段复制到app/page.tsx文件中:
"use client";
import { firstTopics, secondTopics } from "./lib/util";
import { useRouter } from "next/navigation";
export default function Home() {
const router = useRouter();
const handleConfirmClick = (id: string) => {
const result = confirm(`Are you sure you want to take the ${id} test?`);
if (result) {
router.push(`/test/${id}`);
} else {
alert(`You have cancelled the ${id} test`);
}
};
return (
<main className='w-full min-h-screen flex flex-col items-center justify-center'>
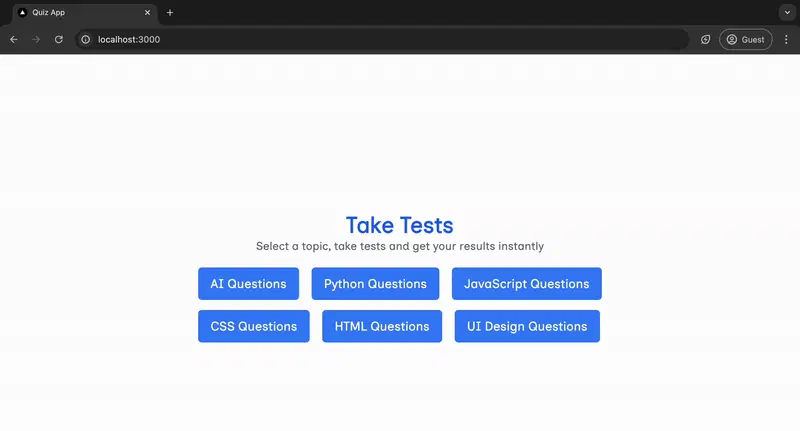
<h2 className='text-4xl font-bold text-blue-600'>Take Tests</h2>
<p className='text-lg text-gray-500 mb-5'>
Select a topic, take tests and get your results instantly
</p>
<div className='px-4'>
<section className='w-full flex items-center space-x-5 mb-4'>
{firstTopics.map((topic) => (
<button
key={topic.id}
className={`bg-blue-500 text-white px-5 py-3 text-xl rounded-md`}
onClick={() => handleConfirmClick(topic.id)}
>
{topic.name}
</button>
))}
</section>
<section className='w-full flex items-center space-x-5'>
{secondTopics.map((topic) => (
<button
key={topic.id}
className={`bg-blue-500 text-white px-5 py-3 text-xl rounded-md`}
onClick={() => handleConfirmClick(topic.id)}
>
{topic.name}
</button>
))}
</section>
</div>
</main>
);
}
主页显示所有可用主题,并在用户单击主题链接时将用户引导至测试页面。
测试页面
page.tsx通过在目录中添加文件来创建测试页test/[id]。将以下代码片段复制到test/[id]/page.tsx文件中:
"use client";
import { useParams } from "next/navigation";
import { useCallback, useEffect, useState } from "react";
import { useRouter } from "next/navigation";
import { capitalize } from "@/app/lib/util";

export default function Test() {
    //👇🏻 array of questions
    const [questions, setQuestions] = useState<Question[]>([]);
    //👇🏻 loading state
    const [loading, setLoading] = useState<boolean>(true);
    //👇🏻 total user's score
    const [userScore, setUserScore] = useState<number>(0);
    //👇🏻 tracks each question in the array
    const [count, setCount] = useState<number>(0);
    //👇🏻 holds the quiz topic
    const { id } = useParams<{ id: string }>();
    const router = useRouter();

    const handleSelectAnswer = (selectedAnswer: string) => {
        //👇🏻 Update the score
        setUserScore((prev) =>
            selectedAnswer === questions[count].answer ? prev + 1 : prev
        );

        //👇🏻 Check if it's the last question
        if (count < questions.length - 1) {
            //👇🏻 Move to the next question
            setCount((prev) => prev + 1);
        } else {
            //👇🏻  If it's the last question, navigate to the score page after the score has updated
            setTimeout(() => {
                router.push(
                    "/score?score=" +
                        (selectedAnswer === questions[count].answer
                            ? userScore + 1
                            : userScore)
                );
            }, 0); // 👈🏼 Ensure the score is updated before navigating
        }
    };

    if (loading) {
        return <h3 className='font-semibold text-2xl mb-3'>Loading...</h3>;
    }

    return (
        <main className='w-full min-h-screen p-6 flex flex-col items-center justify-center'>
            <h2 className='font-bold text-3xl mb-4 text-blue-500'>
                {capitalize(id)}
            </h2>
            <h3 className='font-semibold text-2xl mb-3'>
                Question: {count + 1} of {questions.length}
            </h3>

            <h3 className='text-xl mb-4'>{questions[count]?.question}</h3>

            <div className='flex flex-col lg:w-1/3 mb-6'>
                {questions[count]?.options.map((option, index) => (
                    <button
                        className='p-4 bg-[#EEEEEE]
                rounded-xl mb-6 min-w-[200px] hover:bg-[#EF5A6F] hover:text-white text-lg'
                        key={index}
                        onClick={() => handleSelectAnswer(option)}
                    >
                        {option}
                    </button>
                ))}
            </div>
        </main>
    );
}
从上面的代码片段来看:
- 状态
questions包含所选主题的所有问题,而count状态用于浏览问题数组,允许用户回答每一个问题。 - 该
userScore状态存储了用户完成测试后的总成绩。 - 然后将用户的总分数作为参数传递到分数页面。

分数页
在 Next.js 应用程序文件夹中创建一个score包含page.tsx文件的文件夹,并将代码片段复制到该文件中:
"use client";
import Link from "next/link";
import { useSearchParams } from "next/navigation";

export default function Score() {
    const searchParams = useSearchParams();
    const score = searchParams.get("score");

    if (!score) {
        return (
            <main className='p-4 min-h-screen w-full flex flex-col items-center justify-center'>
                <h2 className='text-2xl font-semibold'>Score</h2>
                <Link href='/' className='bg-blue-500 p-4 text-blue-50 rounded '>
                    Go Home
                </Link>
            </main>
        );
    }

    return (
        <main className='p-4 min-h-screen w-full flex flex-col items-center justify-center'>
            <h2 className='text-2xl font-semibold'>Score</h2>

            <p className='text-lg text-center mb-4'>
                You got {score} out of 10 questions correct.
            </p>

            <h1 className='font-extrabold text-5xl text-blue-500 mb-3'>
                {Number(score) * 10}%
            </h1>

            <Link href='/' className='bg-blue-500 p-4 text-blue-50 rounded '>
                Go Home
            </Link>
        </main>
    );
}
从上面的代码片段来看,分数页面接受用户的总分并以百分比显示结果。

如何在 Next.js 应用程序中集成 OpenAI
OpenAI允许我们将各种大型语言模型 (LLM)(例如 GPT-3 和 GPT-4)集成到我们的应用程序中,以构建智能功能。这些模型可以执行各种自然语言处理任务,包括文本生成、翻译、摘要等等。在本节中,您将学习如何使用 OpenAI 生成所需格式的测验问题。
在我们继续之前,请访问 OpenAI 开发者平台 并创建一个新的密钥。

创建一个.env.local文件并将您新创建的密钥复制到该文件中。
OPENAI_API_KEY=<your_API_key>
通过在终端中运行以下命令来安装OpenAI JavaScript SDK :
npm install openai
接下来,让我们创建一个 API 端点,根据用户选择的主题从 OpenAI 检索 AI 生成的问题。
在 Next.js 应用程序目录中添加一个api包含文件的文件夹。route.ts
cd app
mkdir api && cd api
touch route.ts
将下面的代码片段复制到api/route.ts文件中。它接受来自客户端的包含所选主题的 POST 请求。
import { NextRequest, NextResponse } from "next/server";

export async function POST(req: NextRequest) {
    const { topic } = await req.json();

    console.log({ topic }); 👉🏻 // topic is JavaScript, UI Design, etc

    return NextResponse.json({ message: "Fetch complete" }, { status: 200 });
}
在测试页面中,添加一个useEffect钩子,向 API 端点发送 POST 请求并返回问题数组:
const fetchQuestions = useCallback(async () => {
    const request = await fetch(`/api`, {
        method: "POST",
        headers: {
            "Content-Type": "application/json",
        },
        body: JSON.stringify({ topic: id }),
    });
    const data = await request.json();
    setQuestions(data.questions);
    setLoading(false);
}, [id]);

useEffect(() => {
    fetchQuestions();
}, [fetchQuestions]);
在文件夹中添加sample.json文件libs并将以下代码片段复制到其中:
{
    "questions": [
        {
            "id": 1,
            "question": "What is the capital of France?",
            "options": ["Paris", "London", "Berlin", "Madrid"],
            "answer": "Paris"
        },
        {
            "id" : 2,
            "question": "What is the capital of Germany?",
            "options": ["Paris", "London", "Berlin", "Madrid"],
            "answer": "Berlin"
        }
    ]
}
该sample.json文件定义了 OpenAI 预期问题的结构。
最后,更新 API 端点以使用 OpenAI LLM 生成并返回 JSON 格式的问题列表。
import { NextRequest, NextResponse } from "next/server";
import sampleQuestions from "@/app/lib/sample.json"
import OpenAI from "openai";

const openai = new OpenAI({
    apiKey: process.env.OPENAI_API_KEY,
});

export async function POST(req: NextRequest) {
    //👇🏻 User's selected topic
    const { topic } = await req.json();

    //👇🏻 AI prompt
        const prompt = `Generate 10 distinct questions on ${topic} and ensure they are in JSON format containing an id, topic which is ${topic}, a question attribute containing the question, an options array of 3 options, and an answer property. Please ensure that the options array is shuffled to ensure that the answer does not retain a single position.
    - Please don't make the answers too obvious and lengthy.
    - Ensure the questions are unique and not repetitive.
    - The questions should not be too simple but intermediate level.
    - Return only the JSON object containing the questions.
    You can use this as a sample: ${JSON.stringify(sampleQuestions)}
    `;

    //👇🏻 Generates the questions
    const completion = await openai.chat.completions.create({
        model: "gpt-3.5-turbo",
        messages: [
            {
                role: "user",
                content: prompt,
            },
        ],
    });

  //👇🏻 Questions result
    const aiQuestions = completion.choices[0].message.content;
    const questions = JSON.parse(aiQuestions!);

    if (questions.questions.length < 10) {
        return NextResponse.json(
            { message: "Error generating questions", questions },
            { status: 400 }
        );
    }
    //👇🏻 Returns the list of questions
    return NextResponse.json(
        { message: "Fetch complete", questions: questions.questions },
        { status: 200 }
    );
}
上面的代码片段创建了一个格式精确的提示,该提示使用 OpenAI 的 GPT-3 模型生成所需的问题。生成的问题随后会被返回。

恭喜!您已完成本教程的项目。
后续步骤
到目前为止,您已经学习了如何构建一个 AI 生成的测验应用程序。您可以通过验证用户身份并将其分数保存到数据库中来改进该应用程序。
借助有效的提示,您可以利用 AI 创建智能软件应用程序。Latitude 正在完善这一流程,通过提示工程释放 AI 的全部潜力。
想成为 AI 应用新时代的先行者吗?加入我们的候补名单,开启您的 AI 之旅。
感谢您的阅读!
文章来源:https://dev.to/latitude/building-an-ai-powered-quiz-application-with-nextjs-and-openai-2673