如何构建:基于 AI 的 PowerPoint 生成器(Next.js、OpenAI、CopilotKit)
TL;DR
TL;DR
在本文中,您将学习如何使用 Nextjs、CopilotKit 和 OpenAI 构建 AI 驱动的 PowerPoint 应用程序。我们将涵盖以下内容:
- 利用 ChatGPT 创建您的 PowerPoint 演示文稿📊
- 与您的 PowerPoint 演示文稿聊天💬
- 向 PowerPoint 演示文稿添加音频和图像🔉
CopilotKit:构建深度集成的应用内 AI 聊天机器人💬
CopilotKit 是开源的 AI Copilot 平台。我们让您能够轻松地将强大的 AI 聊天机器人集成到您的 React 应用中。完全可定制且深度集成。
现在回到文章。
先决条件
要开始本教程,您需要在计算机上安装以下软件:
- 文本编辑器(例如 Visual Studio Code)
- Node.js
- 包管理器
使用 NextJS 创建 PowerPoint 应用程序前端
步骤 1:使用以下命令克隆 PowerPoint 应用程序样板。
git clone https://github.com/TheGreatBonnie/aipoweredpowerpointpresentation
第 2 步:在文本编辑器上打开 PowerPoint 应用程序样板,并使用以下命令安装所有项目依赖项。
npm install
步骤 3:• 转到根目录 *并创建一个名为 * 的文件.env.local。在该文件中,添加以下用于保存 ChatGPT API 密钥的环境变量。
OPENAI_API_KEY="Your ChatGPT API Key”
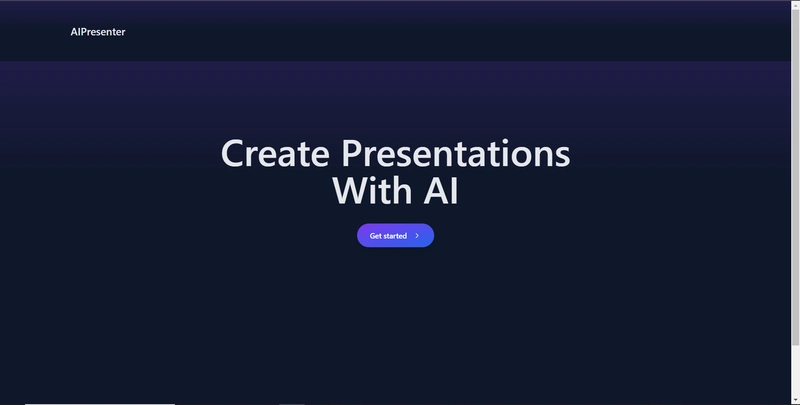
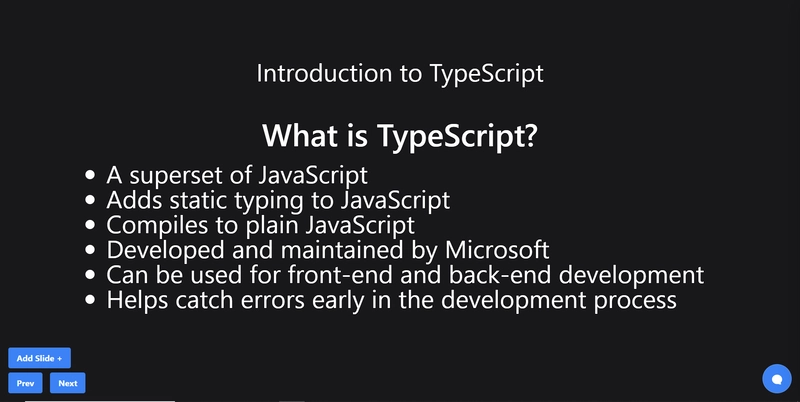
步骤 4: 在命令行中 运行命令 npm run dev 。导航到http://localhost:3000/,您应该会看到 PowerPoint 应用程序前端。
创建 PowerPoint 幻灯片功能
步骤 1:转到 /[root]/src/app/components,并创建一个名为 的文件present.tsx。然后在文件顶部导入以下依赖项。
"use client";

import { useCopilotContext } from "@copilotkit/react-core";
import { CopilotTask } from "@copilotkit/react-core";
import {
  useMakeCopilotActionable,
  useMakeCopilotReadable,
} from "@copilotkit/react-core";
import { useEffect, useState } from "react";
import "./../presentation/styles.css";
import Markdown from "react-markdown";
第 2 步:为 PowerPoint 演示文稿幻灯片定义一个名为 Slide 的 TypeScript 接口,其中包含标题和内容属性。
// Define slide interface
interface Slide {
  title: string;
  content: string;

}
步骤 3:创建一个名为的函数Presentation并初始化名为的状态变量,allSlides变量将保存幻灯片数组,而将保存当前幻灯片索引。currentSlideIndexusestate.allSlidescurrentSlideIndex
export function Presentation (){
  const [allSlides, setAllSlides] = useState<Slide[]>([]);
  const [currentSlideIndex, setCurrentSlideIndex] = useState<number>(0);
}
步骤 4:在Presentation函数内部,使用useMakeCopilotReadable钩子将幻灯片数组添加allSlides为应用内聊天机器人的上下文。
useMakeCopilotReadable("Powerpoint presentation slides: " + JSON.stringify(allSlides));
步骤 5:使用useMakeCopilotActionable钩子设置一个带有描述的动作和一个更新和状态变量createNewPowerPointSlide的实现函数,如下所示。allSlidescurrentSlideIndex
useMakeCopilotActionable(
        {
          name: "createNewPowerPointSlide",
          description: "create slides for a powerpoint presentation. Call this function multiple times to present multiple slides.",
          argumentAnnotations: [
            {
              name: "slideTitle",
              type: "string",
              description: "The topic to display in the presentation slide. Use simple markdown to outline your speech, like a headline.",
              required: true,
            },
            {
              name: "content",
              type: "string",
              description: "The content to display in the presentation slide. Use simple markdown to outline your speech, like lists, paragraphs, etc.",
              required: true
            },

          ],

          implementation: async (newSlideTitle, newSlideContent) => {
            const newSlide: Slide = { title: newSlideTitle, content: newSlideContent};
            const updatedSlides = [...allSlides, newSlide];
            setAllSlides(updatedSlides);
            setCurrentSlideIndex(updatedSlides.length - 1);


          },
        },
        [],
      );
第六步:定义一个函数displayCurrentSlide,在前端显示当前幻灯片索引。
// Display current slide
      const displayCurrentSlide = () => {
        const slide = allSlides[currentSlideIndex];
        return slide ? (

          <div
          className="h-screen flex flex-col justify-center items-center text-5xl text-white bg-cover bg-center bg-no-repeat p-10 text-center"
          style={{
              textShadow: "1px 1px 0 #000, -1px -1px 0 #000, 1px -1px 0 #000, -1px 1px 0 #000",
            }}
          >
          <Markdown className="markdown">{slide.title}</Markdown>
          <Markdown className="markdown">{slide.content}</Markdown>
        </div>
        ) : (
          <div className="h-screen flex flex-col justify-center items-center text-5xl text-white bg-cover bg-center bg-no-repeat p-10 text-center">
            No Slide To Display
          </div>
        );
      };
步骤 7:定义一个名为 addSlide 的函数,该函数包含一个名为 CopilotTask 的类。CopilotTask 类定义了添加新幻灯片的功能。
// Add new slide function
  const addSlide = new CopilotTask({
    instructions: "create a new slide",
    actions: [
      {
        name: "newSlide",
        description: "Make a new slide related to the current topic.",
        argumentAnnotations: [
          {
            name: "title",
            type: "string",
            description: "The title to display in the presentation slide.",
            required: true,
          },
          {
            name: "content",
            type: "string",
            description: "The title to display in the presentation slide.",
            required: true,
          },
        ],

        implementation: async (newSlideTitle,newSlideContent,) => {
          const newSlide: Slide = {title: newSlideTitle,content: newSlideContent,};
          const updatedSlides = [...allSlides, newSlide];
          setAllSlides(updatedSlides);
          setCurrentSlideIndex(updatedSlides.length - 1);
        },
      },
    ],
  });

  const context = useCopilotContext();

  const [randomSlideTaskRunning, setRandomSlideTaskRunning] = useState(false);
步骤 8:定义两个名为 goBack 和 goForward 的函数。goBack 函数定义导航到上一张幻灯片的功能,而 goForward 函数定义导航到下一张幻灯片的功能。
// Button click handlers for navigation
      const goBack = () => setCurrentSlideIndex((prev) => Math.max(0, prev - 1));
      const goForward = () => setCurrentSlideIndex((prev) => Math.min(allSlides.length - 1, prev + 1));
步骤9:返回一个调用displayCurrentSlide函数,并包含调用addSlide、goBack和goForward函数的按钮的组件。
return (
        <div>
          {displayCurrentSlide()}
          <button
            disabled={randomSlideTaskRunning}
            className={`absolute bottom-12 left-0 mb-4 ml-4 bg-blue-500 text-white font-bold py-2 px-4 rounded
            ${randomSlideTaskRunning ? "opacity-50 cursor-not-allowed" : "hover:bg-blue-700"}`}
            onClick={async () => {
              try {
                setRandomSlideTaskRunning(true);
                await addSlide.run(context);
              } finally {
                setRandomSlideTaskRunning(false);
              }
            }}
          >
            {randomSlideTaskRunning ? "Loading slide..." : "Add Slide +"}
          </button>
          <button
          className={`absolute bottom-0 left-0 mb-4 ml-4 bg-blue-500 text-white font-bold py-2 px-4 rounded
          ${randomSlideTaskRunning ? "opacity-50 cursor-not-allowed" : "hover:bg-blue-700"}`}
          onClick={goBack}>Prev</button>
          <button
          className={`absolute bottom-0 left-20 mb-4 ml-4 bg-blue-500 text-white font-bold py-2 px-4 rounded
          ${randomSlideTaskRunning ? "opacity-50 cursor-not-allowed" : "hover:bg-blue-700"}`}
          onClick={goForward}>Next</button>
        </div>
      );
步骤10:在Presentation文件夹中,将以下代码添加到page.tsx文件。
"use client";

import {
  CopilotKit
} from "@copilotkit/react-core";
import { CopilotSidebar } from "@copilotkit/react-ui";
import {Presentation} from "../components/present";
import "./styles.css";

let globalAudio: any = undefined;
let globalAudioEnabled = false;

const Demo = () => {
  return (
    <CopilotKit url="/api/copilotkit/openai">
      <CopilotSidebar
        defaultOpen={true}
        labels={{
          title: "Presentation Copilot",
          initial: "Hi you! 👋 I can give you a presentation on any topic.",
        }}
        clickOutsideToClose={false}
        onSubmitMessage={async (message) => {
          if (!globalAudioEnabled) {
            globalAudio.play();
            globalAudio.pause();
          }
          globalAudioEnabled = true;
        }}
      >
        <Presentation/>
      </CopilotSidebar>
    </CopilotKit>
  );
};

export default Demo;
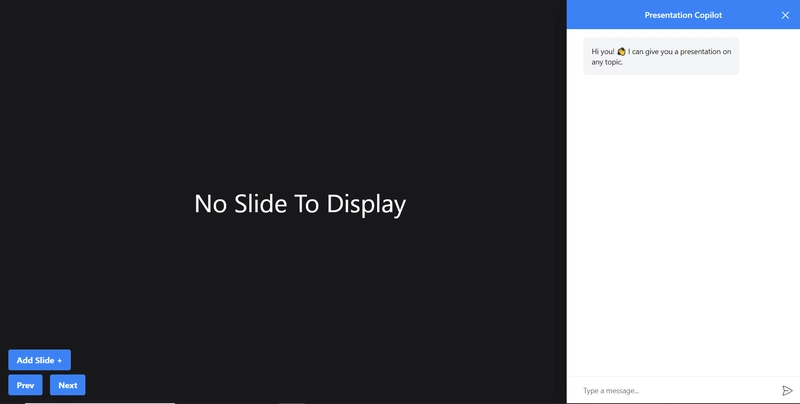
第十一步:访问 http://localhost:3000/,点击“开始”按钮,会跳转到集成聊天机器人的演示页面,如下图所示。
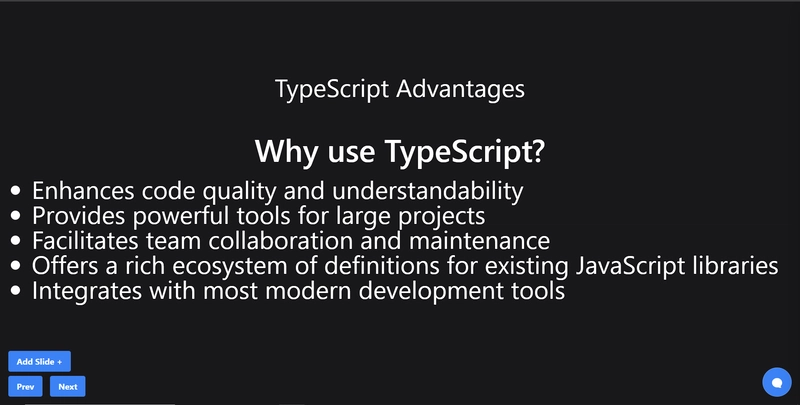
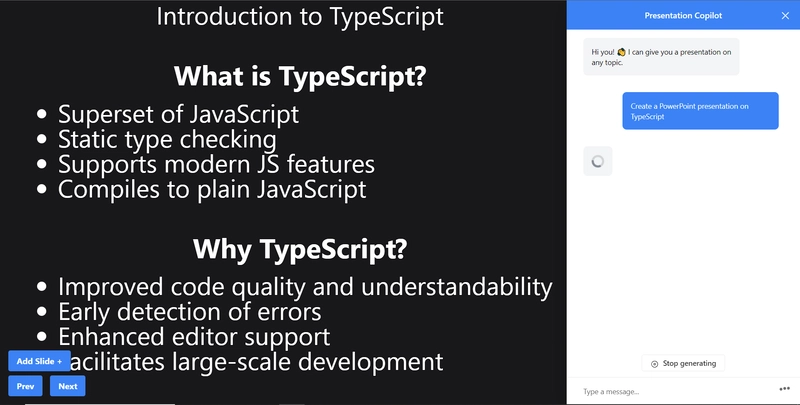
步骤 12:向右侧的聊天机器人发出提示,例如“在 TypeScript 上创建 PowerPoint 演示文稿”。聊天机器人将开始生成响应,完成后,它将在页面左侧显示生成的 PowerPoint 幻灯片,如下所示
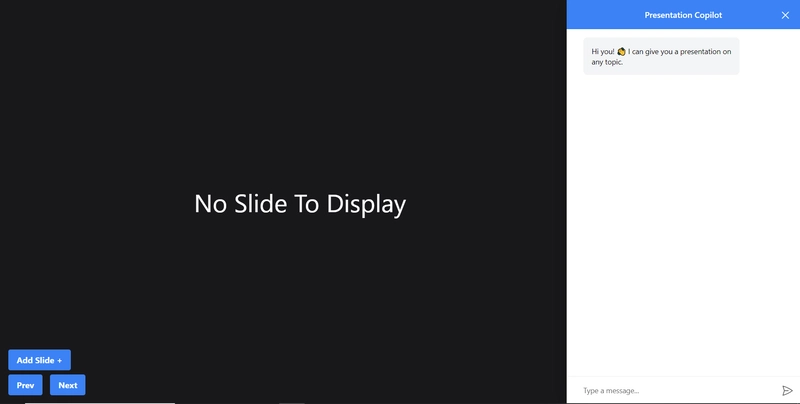
第 13 步:关闭聊天机器人窗口,然后单击添加幻灯片 + 按钮向 PowerPoint 演示文稿添加新幻灯片,如下所示。
步骤14:点击“上一张”按钮,您将导航到上一张幻灯片。点击“下一张”按钮,您将导航到下一张幻灯片。
创建 PowerPoint 幻灯片自动语音功能
步骤1:在present.tsx文件中,声明一个名为的变量globalAudio,如下所示。
let globalAudio: any = undefined;
第 2 步:在Presentation组件内部,声明一个使用新对象useEffect初始化的钩子,如下所示。globalAudioAudio
useEffect(() => {
        if (!globalAudio) {
          globalAudio = new Audio();
        }
      }, []);
步骤 3:更新 useMakeCopilotActionable 钩子,通过 API 将 PowerPoint 幻灯片文本转换为语音,如下所示。
useMakeCopilotActionable(
        {
          name: "createNewPowerPointSlide",
          description: "create slides for a powerpoint presentation. Call this function multiple times to present multiple slides.",
          argumentAnnotations: [
            {
              name: "slideTitle",
              type: "string",
              description: "The topic to display in the presentation slide. Use simple markdown to outline your speech, like a headline.",
              required: true,
            },
            {
              name: "content",
              type: "string",
              description: "The content to display in the presentation slide. Use simple markdown to outline your speech, like lists, paragraphs, etc.",
              required: true
            },

            {
                name: "speech",
                type: "string",
                description: "An informative speech about the current slide.",
                required: true,
            },
          ],

          implementation: async (newSlideTitle, newSlideContent, speech) => {
            const newSlide: Slide = { title: newSlideTitle, content: newSlideContent };
            const updatedSlides = [...allSlides, newSlide];
            setAllSlides(updatedSlides);
            setCurrentSlideIndex(updatedSlides.length - 1);

            const encodedText = encodeURIComponent(speech);
            const url = `/api/tts?text=${encodedText}`;
            globalAudio.src = url;
            await globalAudio.play();
            await new Promise<void>((resolve) => {
                globalAudio.onended = function () {
                resolve();
                };
            });
            await new Promise((resolve) => setTimeout(resolve, 500));
          },
        },
        [],
      );
步骤 4:更新 addSlide 函数,通过 API 将新的 PowerPoint 幻灯片文本转换为语音,如下所示。
// Add new slide function
      const addSlide = new CopilotTask({
        instructions: "create a new slide",
        actions: [
          {
          name: "newSlide",
          description: "Make a new slide related to the current topic.",
          argumentAnnotations: [
            {
              name: "title",
              type: "string",
              description:"The title to display in the presentation slide.",
              required: true,
            },
            {
              name: "content",
              type: "string",
              description:"The title to display in the presentation slide.",
              required: true,
            },

            {
                name: "speech",
                type: "string",
                description: "An informative speech about the current slide.",
                required: true,
            },
          ],

          implementation: async (newSlideTitle, newSlideContent, speech) => {
            const newSlide: Slide = { title: newSlideTitle, content: newSlideContent };
            const updatedSlides = [...allSlides, newSlide];
            setAllSlides(updatedSlides);
            setCurrentSlideIndex(updatedSlides.length - 1);

            const encodedText = encodeURIComponent(speech);
            const url = `/api/tts?text=${encodedText}`;
            globalAudio.src = url;
            await globalAudio.play();
            await new Promise<void>((resolve) => {
                globalAudio.onended = function () {
                resolve();
                };
            });
            await new Promise((resolve) => setTimeout(resolve, 500));
          },
        }
        ]
      });
步骤 5:再次向聊天机器人发出“在 TypeScript 上创建 PowerPoint 演示文稿”提示,您应该会听到演示幻灯片的声音。
创建图像生成功能
步骤1:在present.tsx文件中,添加一个名为backgroundImage的新属性,用于输入界面Slide,如下所示。
// Define slide interface
interface Slide {
  title: string;
  content: string;
  backgroundImage: string;
}
第 2 步:更新 useMakeCopilotActionable 挂钩以生成 PowerPoint 演示文稿幻灯片的图像。
useMakeCopilotActionable(
        {
          name: "createPowerPointSlides",
          description: "create slides for a powerpoint presentation. Call this function multiple times to present multiple slides.",
          argumentAnnotations: [
            {
              name: "slideTitle",
              type: "string",
              description: "The topic to display in the presentation slide. Use simple markdown to outline your speech, like a headline.",
              required: true,
            },
            {
              name: "content",
              type: "string",
              description: "The content to display in the presentation slide. Use simple markdown to outline your speech, like lists, paragraphs, etc.",
              required: true
            },
            {
                name: "backgroundImage",
                type: "string",
                description: "What to display in the background of the slide (i.e. 'dog' or 'house').",
                required: true,
              },
            {
                name: "speech",
                type: "string",
                description: "An informative speech about the current slide.",
                required: true,
            },
          ],

          implementation: async (newSlideTitle, newSlideContent, newSlideBackgroundImage, speech) => {
            const newSlide: Slide = { title: newSlideTitle, content: newSlideContent, backgroundImage: newSlideBackgroundImage };
            const updatedSlides = [...allSlides, newSlide];
            setAllSlides(updatedSlides);
            setCurrentSlideIndex(updatedSlides.length - 1);

            const encodedText = encodeURIComponent(speech);
            const url = `/api/tts?text=${encodedText}`;
            globalAudio.src = url;
            await globalAudio.play();
            await new Promise<void>((resolve) => {
                globalAudio.onended = function () {
                resolve();
                };
            });
            await new Promise((resolve) => setTimeout(resolve, 500));
          },
        },
        [],
      );
第 2 步:更新 addSlide 函数以生成新的 PowerPoint 演示文稿幻灯片的图像。
步骤 3:更新文件Slide中的组件slide.tsx以通过unsplash.com
// Add new slide function
      const addSlide = new CopilotTask({
        instructions: "create a new slide",
        functions: [
          {
          name: "newSlide",
          description: "Make a new slide related to the current topic.",
          argumentAnnotations: [
            {
              name: "title",
              type: "string",
              description:"The title to display in the presentation slide.",
              required: true,
            },
            {
              name: "content",
              type: "string",
              description:"The title to display in the presentation slide.",
              required: true,
            },
            {
                name: "backgroundImage",
                type: "string",
                description: "What to display in the background of the slide (i.e. 'dog' or 'house').",
                required: true,
              },
            {
                name: "speech",
                type: "string",
                description: "An informative speech about the current slide.",
                required: true,
            },
          ],

          implementation: async (newSlideTitle, newSlideContent, newSlideBackgroundImage, speech) => {
            const newSlide: Slide = { title: newSlideTitle, content: newSlideContent, backgroundImage: newSlideBackgroundImage };
            const updatedSlides = [...allSlides, newSlide];
            setAllSlides(updatedSlides);
            setCurrentSlideIndex(updatedSlides.length - 1);

            const encodedText = encodeURIComponent(speech);
            const url = `/api/tts?text=${encodedText}`;
            globalAudio.src = url;
            await globalAudio.play();
            await new Promise<void>((resolve) => {
                globalAudio.onended = function () {
                resolve();
                };
            });
            await new Promise((resolve) => setTimeout(resolve, 500));
          },
        }
        ]
      });
步骤 3:更新 displayCurrentSlide 函数以向 PowerPoint 演示文稿幻灯片添加背景图像。
// Display current slide
      const displayCurrentSlide = () => {
        const slide = allSlides[currentSlideIndex];
        return slide ? (

          <div
          className="h-screen flex flex-col justify-center items-center text-5xl text-white bg-cover bg-center bg-no-repeat p-10 text-center"
          style={{
              backgroundImage: 'url("https://source.unsplash.com/featured/?' + encodeURIComponent(allSlides[currentSlideIndex].backgroundImage) + '")',
              textShadow: "1px 1px 0 #000, -1px -1px 0 #000, 1px -1px 0 #000, -1px 1px 0 #000",
            }}
          >
          <Markdown className="markdown">{slide.title}</Markdown>
          <Markdown className="markdown">{slide.content}</Markdown>
        </div>
        ) : (
          <div className="h-screen flex flex-col justify-center items-center text-5xl text-white bg-cover bg-center bg-no-repeat p-10 text-center">
            No Slide To Display
          </div>
        );
      };
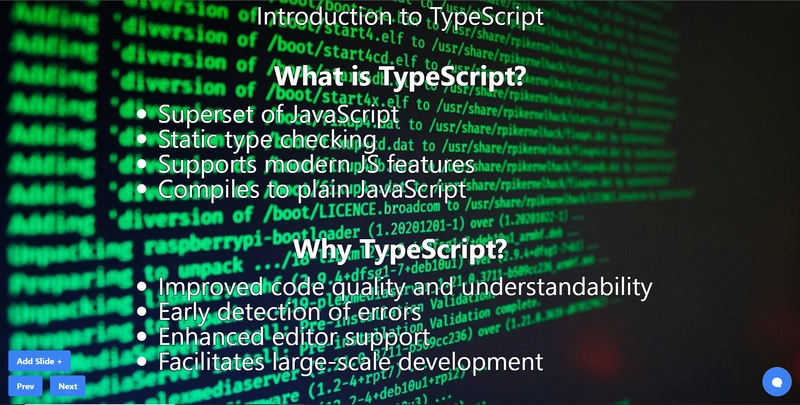
步骤 4:转到 Web 应用程序,您应该会看到背景图像已添加到 PowerPoint 幻灯片中。
结论
总而言之,您可以使用 CopilotKit 构建应用内 AI 聊天机器人,它可以查看当前应用状态并在应用内执行操作。该 AI 聊天机器人可以与您的应用前端、后端以及第三方服务进行通信。
结论
总而言之,您可以使用 CopilotKit 构建应用内 AI 聊天机器人,它可以查看当前应用状态并在应用内执行操作。该 AI 聊天机器人可以与您的应用前端、后端以及第三方服务进行通信。
完整源代码:
https://github.com/TheGreatBonnie/aipoweredpresentation
感谢@theGreatBonnie 对本文所做的出色工作。
别忘了……
文章来源:https://dev.to/copilotkit/how-to-build-ai-powered-powerpoint-app-nextjs-openai-copilotkit-ji2 后端开发教程 - Java、Spring Boot 实战 - msg200.com

