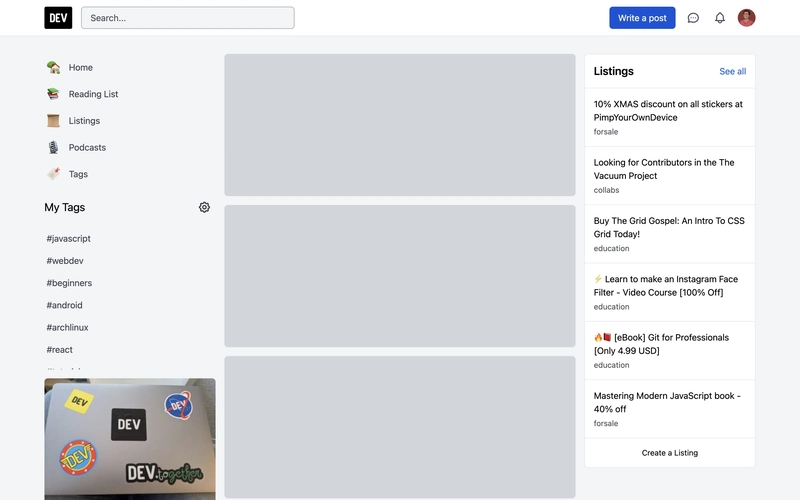
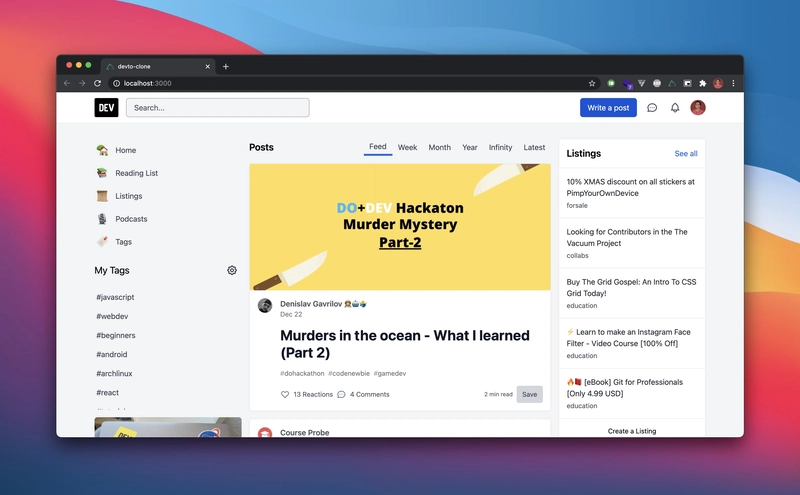
使用 Nuxt 和 Tailwindcss 克隆 Dev.to,使用 dev.to api(桌面视图)
让我们使用实际的 dev.to api 克隆 dev.to 来获取文章。
我将使用 Nuxt.js 作为 Web 框架,并使用 Tailwindcss 来制作 UI。
TL;DR
这是现场演示 - https://devto-one.vercel.app/
这是 Github repo - https://github.com/fayazara/devto-clone
我打算用不同的方式写这篇文章,我会边写代码边写,所以你可能会觉得这篇文章有点不一样。另外,由于文章可能会很长,我目前只制作桌面版。如果有人需要的话,我可能会在第二部分写关于如何让它支持响应式。
待处理事项
- 使其具有响应性。
- 添加无限滚动以获取下一组文章。
1. 设置项目
使用以下命令创建一个新的 nuxt 项目npx create-nuxt-app devto-clone,并确保选择 tailwindcss。完成后,让我们升级到 tailwindcss v2,因为大多数框架尚不支持 PostCSS 8,因此您目前需要安装 Tailwind CSS v2.0 PostCSS 7 兼容版本,如下所示。
卸载 @nuxtjs/tailwindcss 模块,npm uninstall @nuxtjs/tailwindcss tailwindcss然后重新安装依赖项以及postcss7-compat模块
npm install -D @nuxtjs/tailwindcss tailwindcss@npm:@tailwindcss/postcss7-compat @tailwindcss/postcss7-compat postcss@^7 autoprefixer@^9
这将安装所有正确的依赖项,以便我们使用 Tailwindcss v2。
有关如何将 Tailwind 与 Nuxt.js 结合使用的更多信息,请参见此处。
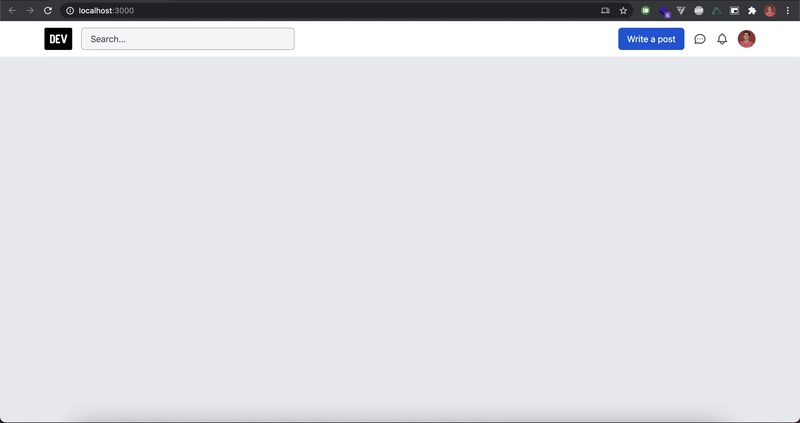
项目启动完成后,请确保删除 和 中的所有样板文件pages/index.vue。layouts/default.vue类似下面的截图。
2. Dev.to 布局解析
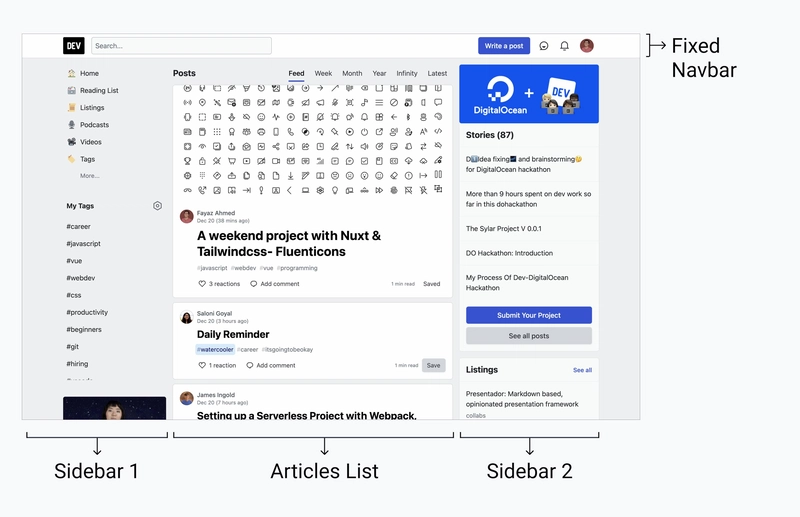
嗯,顶级 dev.to 有一个布局,俗称“圣杯布局”——一个三列布局,两侧有固定的内容侧边栏,中间有一个可滚动的延迟加载内容列表。
导航栏
导航栏有,position: fixed并且display: flex有正确的内容margin-left: auto
我们也可以这样做justify-content: space-between,但我们只按照 dev-to 的方式来做。
内容区域
此部分使用display: grid中间部分,其面积比其他部分稍大,可通过顺风网格实用程序完成。
编写导航栏代码
创建一个名为 的组件navbar.vue,添加一个固定标题并将其放入容器中。我还创建了 3 个组件来添加导航栏元素。
这将使导航栏看起来与开发人员完全一样,这是各个组件的代码。
搜索.vue
我使用了固定宽度,这并不是一个好的做法,像这样的元素需要具有相对于屏幕尺寸的宽度,但仅仅为了本文的目的,让我们有一个w-96类。
我还使用@apply指令提取了 tailwind 的类并用它创建了一个自定义类,对于所有说在使用 tailwindcss 时我的 html 类变得越来越长的人来说,这就是保持代码清洁的方法。
| <template> | |
| <div class="mx-4 w-96"> | |
| <input | |
| type="text" | |
| placeholder="Search..." | |
| class="search-bar search-focus" | |
| /> | |
| </div> | |
| </template> | |
| <style scoped> | |
| .search-bar { | |
| @apply text-gray-600 placeholder-gray-600 rounded-md p-4 h-10 bg-gray-100 w-full border border-gray-400; | |
| } | |
| .search-focus { | |
| @apply focus:outline-none focus:ring-2 focus:ring-blue-600 focus:border-transparent; | |
| } | |
| </style> |
导航栏操作组件
因此,我使用该类ml-auto将内容推到左侧,并使用space-x-4类进行弯曲以在每个元素之间添加一点空间。
我还利用了 svgbox api 来获取图标。
| <template> | |
| <main class="min-h-screen bg-gray-200" style="margin-top: 65px"> | |
| <section class="container mx-auto py-8"> | |
| <div class="grid grid-cols-4 gap-4"> | |
| <div> | |
| <ul class="space-y-4"> | |
| <li class="h-8 rounded bg-red-400" v-for="n in 7" :key="n"></li> | |
| </ul> | |
| </div> | |
| <div class="col-span-2"> | |
| <ul class="space-y-4"> | |
| <li class="h-64 rounded bg-green-400" v-for="n in 20" :key="n"></li> | |
| </ul> | |
| </div> | |
| <div> | |
| <ul class="space-y-4"> | |
| <li class="h-8 rounded bg-blue-400" v-for="n in 7" :key="n"></li> | |
| </ul> | |
| </div> | |
| </div> | |
| </section> | |
| </main> | |
| </template> |
logo.vue只是 vue 组件内的 svg 。
现在,让我们在图像悬停时进行下拉菜单,以显示帐户选项。
我利用了上一篇文章中下拉菜单的相同概念,您可以在此处阅读。
这是下拉菜单的代码。
| <template> | |
| <div class="relative h-full flex items-center" @mouseenter="show = true" @mouseleave="show = false"> | |
| <button | |
| class="rounded-full overflow-hidden focus:ring-2 focus:ring-offset-1 focus:ring-offset-white focus:ring-blue-800 focus:outline-none" | |
| > | |
| <img src="https://fayazz.co/fayaz.jpg" class="h-8 w-8" alt="Profile" /> | |
| </button> | |
| <transition | |
| enter-active-class="transition-all ease-out duration-100" | |
| enter-class="transform opacity-0 scale-95" | |
| enter-to-class="transform opacity-100 scale-100" | |
| leave-active-class="transition-all ease-in duration-75" | |
| leave-class="transform opacity-100 scale-100" | |
| leave-to-class="transform opacity-0 scale-95" | |
| > | |
| <div | |
| v-if="show" | |
| class="bg-white w-56 rounded-md border-2 border-gray-900 absolute top-12 right-0 mt-2 super-shadow overflow-hidden origin-top-right" | |
| > | |
| <div class="p-2 border-b"> | |
| <p>Fayaz Ahmed</p> | |
| <p class="text-sm text-gray-500">@fayaz</p> | |
| </div> | |
| <ul class="border-b p-2"> | |
| <li class="py-2 pl-1 rounded hover:bg-gray-100">Dashboard</li> | |
| <li class="py-2 pl-1 rounded hover:bg-gray-100">Write a post</li> | |
| <li class="py-2 pl-1 rounded hover:bg-gray-100">Reading list</li> | |
| <li class="py-2 pl-1 rounded hover:bg-gray-100">Settings</li> | |
| </ul> | |
| <div class="p-2"> | |
| <p class="py-2 pl-1">Sign Out</p> | |
| </div> | |
| </div> | |
| </transition> | |
| </div> | |
| </template> | |
| <script> | |
| export default { | |
| data() { | |
| return { | |
| show: false, | |
| }; | |
| }, | |
| }; | |
| </script> | |
| <style scoped> | |
| .super-shadow { | |
| box-shadow: 4px 4px 0 #08090a; | |
| } | |
| </style> |
现在我们已经准备好导航栏,让我们转到实际的主页。
制作主页布局
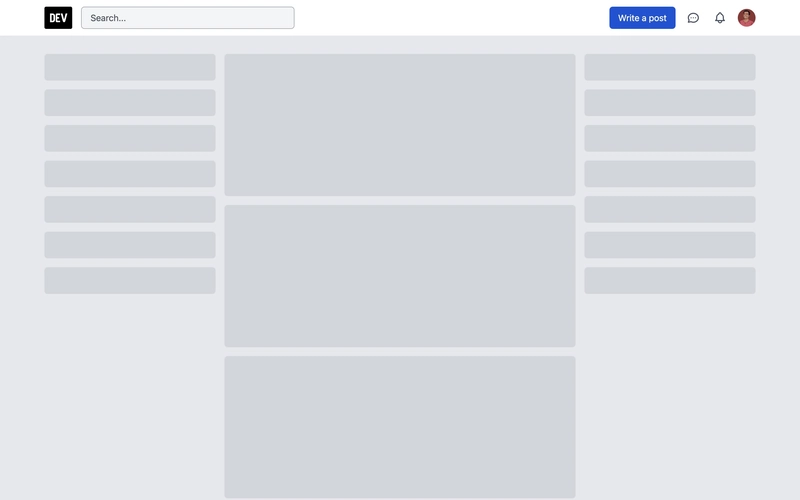
因此,我决定使用 CSS 网格来实现这个布局,采用 4 列布局,并将中间子元素的跨度设为 2。以下是布局的蓝图。(我将为每一列创建一个组件,以下代码片段供您参考)。
| <template> | |
| <main class="min-h-screen bg-gray-200" style="margin-top: 65px"> | |
| <section class="container mx-auto py-8"> | |
| <div class="grid grid-cols-4 gap-4"> | |
| <div> | |
| <ul class="space-y-4"> | |
| <li class="h-8 rounded bg-red-400" v-for="n in 7" :key="n"></li> | |
| </ul> | |
| </div> | |
| <div class="col-span-2"> | |
| <ul class="space-y-4"> | |
| <li class="h-64 rounded bg-green-400" v-for="n in 20" :key="n"></li> | |
| </ul> | |
| </div> | |
| <div> | |
| <ul class="space-y-4"> | |
| <li class="h-8 rounded bg-blue-400" v-for="n in 7" :key="n"></li> | |
| </ul> | |
| </div> | |
| </div> | |
| </section> | |
| </main> | |
| </template> |
这段代码就是我们需要的像 dev.to 这样的布局,它将生成如下所示的 UI,请注意,我添加了一个,margin-top: 65px因为导航栏的高度正好是 65px。
好的,让我们开始将实际内容编码到这些占位符中。
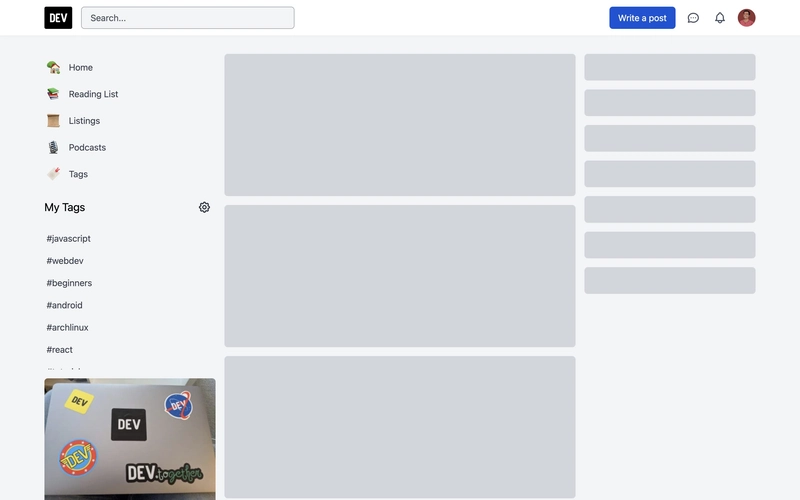
制作左栏
左栏有三个部分:菜单、标签列表和 dev.to 商店的广告横幅。
- 此栏的第一部分是带有一些图标的静态列表。
- 第二部分是标签列表,我将从 dev.to API 的标签端点中提取,您可以在此处找到https://dev.to/api/tags
- 第三个只是 shop.dev.to 的横幅图像。
这是左列的代码,我已经对第一部分进行了硬编码,并从上面的 API 中提取标签并使用 nuxt fetch 方法加载数据,由于这个模块,我还可以使用和显示加载$fetchState.pending状态$fetchState.error
| <template> | |
| <div class="space-y-4"> | |
| <div> | |
| <ul> | |
| <li v-for="(item, i) in items" :key="i"> | |
| <div | |
| class="flex items-center space-x-4 px-1 py-2 rounded-md hover:bg-gray-200 text-gray-700" | |
| > | |
| <span class="text-2xl">{{ item.icon }}</span> | |
| <span>{{ item.title }}</span> | |
| </div> | |
| </li> | |
| </ul> | |
| </div> | |
| <div> | |
| <div class="flex items-center justify-between mb-4"> | |
| <p class="text-xl font-sembold">My Tags</p> | |
| <button class="rounded hover:bg-gray-200 p-2"> | |
| <img | |
| src="https://s.svgbox.net/hero-outline.svg?ic=cog&fill=grey-800" | |
| class="h-6 w-6" | |
| /> | |
| </button> | |
| </div> | |
| <p v-if="$fetchState.pending">Fetching tags...</p> | |
| <p v-else-if="$fetchState.error">An error occurred :(</p> | |
| <ul v-else class="h-64 overflow-y-scroll"> | |
| <li | |
| v-for="(tag, t) in tags" | |
| :key="t" | |
| class="px-1 py-2 rounded-md hover:bg-gray-200 text-gray-700" | |
| > | |
| #{{ tag.name }} | |
| </li> | |
| </ul> | |
| </div> | |
| <div> | |
| <img | |
| class="rounded-md mb-4" | |
| src="https://res.cloudinary.com/practicaldev/image/fetch/s--pVCMYZWJ--/c_limit%2Cf_auto%2Cfl_progressive%2Cq_auto%2Cw_350/https://scontent-lga3-1.cdninstagram.com/vp/7c898e2c9e9fa71f72dd5d422d444549/5DFE1BFA/t51.2885-15/fr/e15/s1080x1080/57390242_386431405416711_440644832181536446_n.jpg%3F_nc_ht%3Dscontent-lga3-1.cdninstagram.com" | |
| alt="Shop Banner" | |
| /> | |
| <p class="text-center text-blue-700 font-semibold text-xl"> | |
| Do you have your sticker pack yet? | |
| </p> | |
| </div> | |
| </div> | |
| </template> | |
| <script> | |
| export default { | |
| data() { | |
| return { | |
| items: [ | |
| { | |
| title: "Home", | |
| icon: "🏡", | |
| }, | |
| { | |
| title: "Reading List", | |
| icon: "📚", | |
| }, | |
| { | |
| title: "Listings", | |
| icon: "📜", | |
| }, | |
| { | |
| title: "Podcasts", | |
| icon: "🎙", | |
| }, | |
| { | |
| title: "Tags", | |
| icon: "🔖", | |
| }, | |
| ], | |
| tags: [], | |
| }; | |
| }, | |
| async fetch() { | |
| try { | |
| const { data } = await this.$axios.get("https://dev.to/api/tags"); | |
| this.tags = data; | |
| } catch (err) { | |
| alert(err); | |
| } | |
| }, | |
| }; | |
| </script> |
最终呈现的样子如下。
确实看起来很棒。
制作右栏
我不会制作黑客马拉松的清单,因为当你读到这篇文章的时候,它可能已经结束了。所以我只会编写清单页面的代码,我们有一个 API https://dev.to/api/listings,它返回的数据比我们需要的多,而我们并不需要这些数据。
PS 右栏还显示了一些其他内容,如新闻、帮助和讨论,我认为这些内容没有 API,所以我现在将跳过它,这部分代码将是开源的,如果有人想为这个例子做出贡献,请继续提交 PR,我们很乐意让你参与。
再次,我使用 nuxt 的 fetch 来显示列表数据。
| <template> | |
| <div class="min-h-nav"> | |
| <div class="rounded-md border overflow-hidden bg-white"> | |
| <div class="flex items-center justify-between p-4 border-b"> | |
| <p class="text-xl font-semibold">Listings</p> | |
| <p class="text-blue-600">See all</p> | |
| </div> | |
| <p v-if="$fetchState.pending">Fetching listings...</p> | |
| <p v-else-if="$fetchState.error">An error occurred :(</p> | |
| <ul v-else class="divide-y border-b"> | |
| <li v-for="(listing, l) in listings.slice(0, 5)" :key="l"> | |
| <div class="p-4 hover:bg-gray-50 group"> | |
| <p class="group-hover:text-blue-600 mb-1"> | |
| {{ listing.title }} | |
| </p> | |
| <p class="text-sm text-gray-600">{{ listing.category }}</p> | |
| </div> | |
| </li> | |
| </ul> | |
| <button class="w-full py-4 text-sm">Create a Listing</button> | |
| </div> | |
| </div> | |
| </template> | |
| <script> | |
| export default { | |
| data() { | |
| return { | |
| listings: [], | |
| }; | |
| }, | |
| async fetch() { | |
| try { | |
| const { data } = await this.$axios.get("https://dev.to/api/listings"); | |
| this.listings = data.map((item) => { | |
| return { | |
| title: item.title, | |
| category: item.category, | |
| }; | |
| }); | |
| } catch (err) { | |
| alert(err); | |
| } | |
| }, | |
| fetchOnServer: false, | |
| }; | |
| </script> |
帖子部分
要获取最新的 30 条帖子,您可以使用此端点https://dev.to/api/articles/,这就是 UI 最终呈现的样子。
嵌入所有这些代码可能会使这篇文章中的代码难以阅读,因此您可以在 Github repo 上找到这些代码。
这是现场演示 - https://devto-one.vercel.app/
这是 Github repo - https://github.com/fayazara/devto-clone
我计划撰写更多关于 Web、Javascript、CSS、Nuxt、Vue 以及其他互联网构建技术的内容。如果您喜欢我的内容,请点击此处给我买杯咖啡,以表达您的支持。
鏂囩珷鏉ユ簮锛�https://dev.to/fayaz/cloning-dev-to-with-nuxt-tailwindcss-with-the-dev-to-api-58oe 后端开发教程 - Java、Spring Boot 实战 - msg200.com

