人工智能旅行规划器,😻你离不开它⚡
想象一下,您正在计划一次终极假期——为期两周的欧洲之旅,其中包括参观博物馆、享用美食和风景优美的徒步旅行。
从决定参观哪些地标到找出最佳就餐地点,选择的数量之多可能会让人不知所措。
输入解决方案:人工智能驱动的旅行计划器,即我们的CopilotKit 😉。
TL;DR
- 使用 Next.js、TypeScript 和 Tailwind CSS 构建由 AI 驱动的旅行计划器 Web 应用程序。
- 使用 CopilotKit 将 AI 功能集成到旅行计划器网络应用程序中。
- 使用 Langchain 和 Tavily 从网络收集信息,以有效地规划旅行的各个方面。
先决条件
要完全理解本教程,您需要对 React 或 Next.js 有基本的了解。
以下是构建人工智能旅行计划器所需的工具。
- Langchain—— 提供一个框架,使 AI 代理能够搜索网络、研究和抓取任何主题或链接。
- OpenAI API - 提供 API 密钥,使您能够使用 ChatGPT 模型执行各种任务。
- Tavily AI—— 一种搜索引擎,使 AI 代理能够进行研究或抓取数据并访问应用程序内的实时知识。
- CopilotKit - 一个开源副驾驶框架,用于构建自定义 AI 聊天机器人、应用内 AI 代理和文本区域。
什么是 AI Copilot?
AI Copilot 是一款应用内 AI 助手,可帮助用户在应用程序内回答问题并采取行动。它将 LLM 智能直接引入您的应用程序。
一些常见的外形尺寸:
- ChatBot:具有上下文感知能力的应用内聊天机器人,可以在应用内采取行动💬
- AI 自动完成:具有上下文感知自动完成和插入功能的 AI 驱动的文本字段📝
- CoAgents:可以与您的应用和用户动态交互的应用内 AI 代理🤖
CopilotKit 是领先、强大且易于使用的开源框架,用于构建应用内 AI 副驾驶。只需几分钟,即可在您的应用中运行完全自定义的 AI 副驾驶。
项目设置和包安装
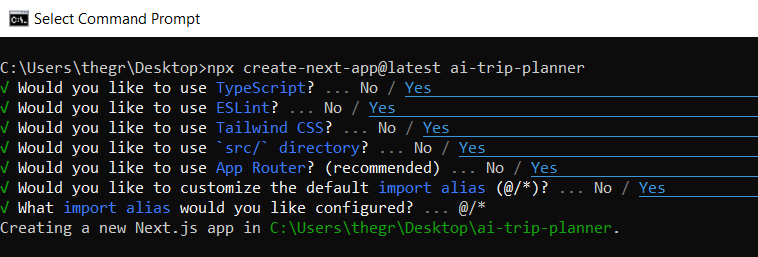
首先,通过在终端中运行以下代码片段来创建 Next.js 应用程序:
npx create-next-app@latest ai-trip-planner
您可以选择您喜欢的配置设置。在本教程中,我们将使用 TypeScript 和 Next.js App Router。
接下来,我们将安装 Langchain 包及其依赖项。
npm install @langchain/langgraph@^0.0.7
最后,安装 CopilotKit 软件包。这些软件包使我们能够从 React 状态中检索数据,并将 AI Copilot 添加到应用程序中。
npm install @copilotkit/react-ui @copilotkit/react-core @copilotkit/runtime
太好了,现在我们已经安装了软件包,让我们开始构建由人工智能驱动的旅行计划器。
构建人工智能驱动的旅行计划前端
首先,我将引导您完成创建由 AI 驱动的旅行计划器前端的过程,该前端使用静态内容来定义旅行计划器用户界面。
首先, /[root]/src/app 在代码编辑器中创建一个名为 的文件夹 components。在 components 文件夹中,创建一个名为 TripPlan.tsx
在该 TripPlan.tsx 文件中,添加以下代码,定义一个名为的 React 功能组件 TripPlan。
"use client"; // Indicates that this file is a client-side file in a Next.js app

import Link from "next/link"; // Importing Link component from Next.js for navigation
import React, { useState } from "react"; // Importing React and useState hook

// Define the structure of a Todo item with an interface
interface Todo {
  time: string;
  activity: string;
  details: string;
}

// Define the TripPlan component
function TripPlan() {
  // Declare a state variable 'tripPlan' to store an array of Todo items, initialized as an empty array
  const [tripPlan, setTripPlan] = useState<Todo[]>([]);

  return (
    <div className="flex flex-col w-full min-h-screen bg-gray-100 dark:bg-gray-800">
      {/* Header section */}
      <header className="flex items-center h-16 px-4 border-b shrink-0 md:px-6 bg-white dark:bg-gray-900">
        {/* Link component for navigation */}
        <Link
          href="#"
          className="flex items-center gap-2 text-lg font-semibold md:text-base"
          prefetch={false}>
          <span className="sr-only text-gray-500">Trip Plan Dashboard</span>
          <h1>AI Trip Plan Generator</h1>
        </Link>
      </header>

      {/* Main content section */}
      <main className="flex-1 p-4 md:p-8 lg:p-10">
        <div className="container mx-auto p-4">
          <h1 className="text-2xl font-bold mb-4">Trip Plan Schedule</h1>
          <div className="overflow-x-auto">
            {/* Table for displaying the trip plan schedule */}
            <table className="min-w-full bg-white border border-gray-300">
              <thead>
                <tr>
                  <th className="px-4 py-2 border-b">Time</th>
                  <th className="px-4 py-2 border-b">Activity</th>
                  <th className="px-4 py-2 border-b">Details</th>
                </tr>
              </thead>
              <tbody>
                {/* Map over the tripPlan state to display each item in the table */}
                {tripPlan.map((item, index) => (
                  <tr
                    key={index}
                    className={index % 2 === 0 ? "bg-gray-100" : "bg-white"}>
                    <td className="px-4 py-2 border-b">{item.time}</td>
                    <td className="px-4 py-2 border-b">{item.activity}</td>
                    <td className="px-4 py-2 border-b">{item.details}</td>
                  </tr>
                ))}
              </tbody>
            </table>
          </div>
        </div>
      </main>
    </div>
  );
}

export default TripPlan; // Export the TripPlan component as the default export
接下来,转到 /[root]/src/page.tsx 文件,并添加以下代码,导入TripPlan 组件并定义一个名为的功能组件 Home。
import TripPlan from "./components/TripPlan";

export default function Home() {
  return <TripPlan />;
}
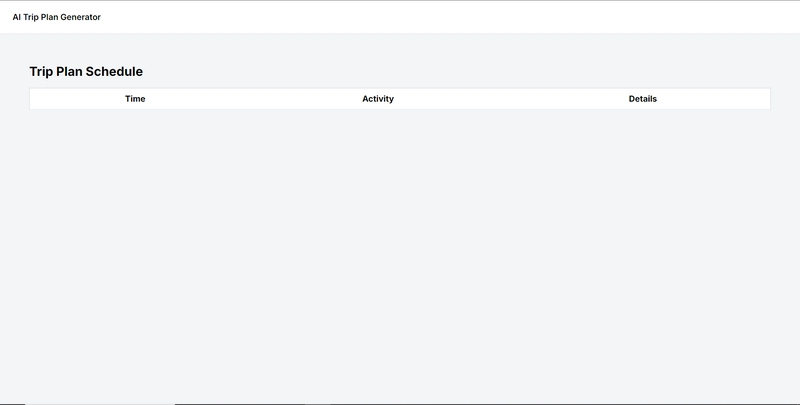
npm run dev 最后,在命令行上 运行该命令 ,然后导航到http://localhost:3000/。
现在您应该可以在浏览器上查看由 AI 驱动的旅行计划器前端,如下所示。
恭喜!现在,您可以为 AI 驱动的行程规划器添加 AI 功能了。
使用 CopilotKit 将 AI 功能集成到旅行计划器
在本节中,您将学习如何将 AI 副驾驶添加到 AI 驱动的旅行计划器中,以使用 CopilotKit 创建旅行计划。
CopilotKit 提供前端和 后端 软件包。它们使您能够接入 React 状态并使用 AI 代理在后端处理应用程序数据。
首先,让我们将 CopilotKit React 组件添加到 Trip Planner 前端。
将 CopilotKit 添加到行程规划器前端
在这里,我将引导您完成将 AI 驱动的旅行计划器与 CopilotKit 前端集成的过程,以促进旅行计划的创建。
首先,使用下面的代码片段 在文件顶部 导入useCopilotReadable、和 、自定义挂钩 。useCopilotAction/src/app/components/TripPlan.tsx
import { useCopilotAction, useCopilotReadable } from "@copilotkit/react-core";
在函数内部 TripPlan ,在状态变量下方,添加以下代码,该代码使用 useCopilotReadable 钩子添加行程计划,该计划将作为应用内聊天机器人的上下文创建。该钩子使副驾驶能够读取行程计划。
useCopilotReadable({
    description: "The user's trip plan.",
    value: tripPlan,
  });
在上面的代码下方,添加以下代码,该代码使用 useCopilotAction 钩子来设置一个名为的操作 createTripPlan ,这将允许创建旅行计划。
该操作接受一个名为的参数,TripDaySchedule该参数包含行程计划的时间、活动和详细信息作为属性。它包含一个处理函数,该函数根据给定的提示创建行程计划。
在处理程序函数内部,tripPlan状态使用新创建的行程计划时间表进行更新,如下所示。
// Use the useCopilotAction hook to define a new action
  useCopilotAction(
    {
      name: "createTripPlan", // Name of the action

      description: "Create a trip plan following a day schedule format.", // Description of the action

      parameters: [
        {
          name: "TripDaySchedule", // Name of the parameter
          type: "object[]", // Type of the parameter (array of objects)
          description: "The schedule for the day trip.", // Description of the parameter

          attributes: [
            {
              name: "time", // Name of the attribute
              type: "string", // Type of the attribute
              description: "The time of the trip day activity.", // Description of the attribute
            },
            {
              name: "activity", // Name of the attribute
              type: "string", // Type of the attribute
              description:
                "The activity to be done in a specific time of the trip day.", // Description of the attribute
            },
            {
              name: "details", // Name of the attribute
              type: "string", // Type of the attribute
              description: "The details for each activity.", // Description of the attribute
            },
          ],
          required: true, // Indicates that this parameter is required
        },
      ],

      // Handler function that sets the trip plan using the TripDaySchedule parameter
      handler: async ({ TripDaySchedule }) => {
        setTripPlan(TripDaySchedule);
      },

      render: "Creating Your Trip...", // Message to display while the action is being processed
    },
    [] // Dependency array (empty in this case)
  );
之后,转到 /[root]/src/app/page.tsx 文件并使用以下代码在顶部导入 CopilotKit 前端包和样式。
import { CopilotKit } from "@copilotkit/react-core";
import { CopilotSidebar } from "@copilotkit/react-ui";
import "@copilotkit/react-ui/styles.css";
然后使用 CopilotKit 包装 CopilotSidebar 和 TripPlan 组件,如下所示。 组件指定 CopilotKit 后端端点 ( ) CopilotKit 的 URL,而 则 渲染应用内聊天机器人,您可以向其提示创建行程计划。/api/copilotkit/CopilotSidebar
import TripPlan from "./components/TripPlan";
import { CopilotKit } from "@copilotkit/react-core";
import { CopilotSidebar } from "@copilotkit/react-ui";
import "@copilotkit/react-ui/styles.css";

// Export the Home component as the default export
export default function Home() {
  return (
    // CopilotKit component with a runtimeUrl prop pointing to the API endpoint
    <CopilotKit runtimeUrl="/api/copilotkit">
      {/* CopilotSidebar component to provide instructions and UI for creating a trip plan */}
      <CopilotSidebar
        instructions={
          "Help the user create a trip plan. Don't add the trip plan to the response."
        } // Instructions for the copilot
        labels={{
          initial:
            "Welcome to the Trip Plan app! Describe the trip you want below.",
        }} // Labels for the copilot UI
        defaultOpen={true} // Sidebar is open by default
        clickOutsideToClose={false} // Clicking outside the sidebar does not close it
      >
        {/* Render the TripPlan component inside the CopilotSidebar */}
        <TripPlan />
      </CopilotSidebar>
    </CopilotKit>
  );
}
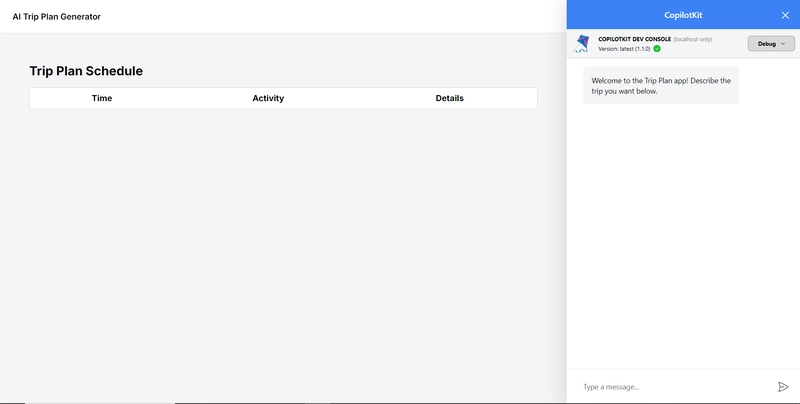
现在我们需要运行开发服务器并导航到 http://localhost:3000。
您应该看到应用内聊天机器人已集成到人工智能旅行计划器中。
将 CopilotKit 后端添加到 AI 驱动的旅行计划器
在这里,我将引导您完成将旅行计划器与 CopilotKit后端集成的过程,该后端处理来自前端的请求,并提供函数调用和各种 LLM 后端(例如 GPT)。
首先,在根目录中创建一个名为 的文件 。然后在保存您的 搜索 API 密钥.env.local 的文件中添加以下环境变量 。ChatGPTTavily
OPENAI_API_KEY="Your ChatGPT API key"
TAVILY_API_KEY="Your Tavily Search API key"
OPENAI_MODEL=gpt-4-1106-preview
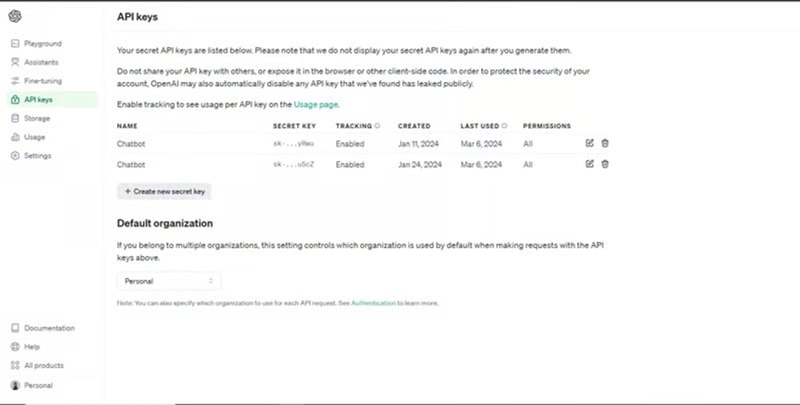
要获取 ChatGPT API 密钥,请导航至 https://platform.openai.com/api-keys。
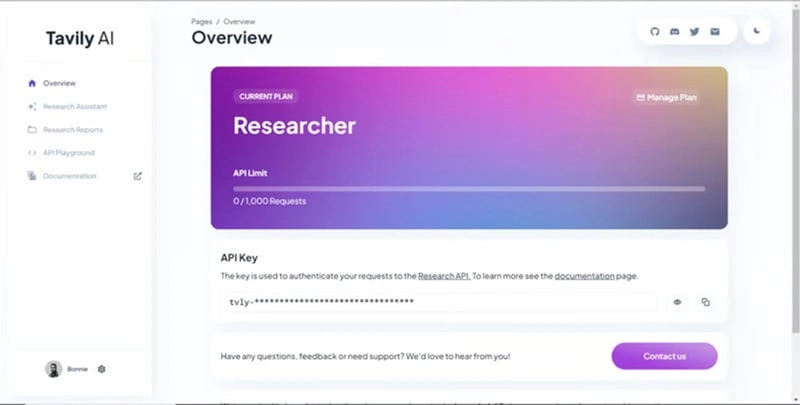
要获取 Tavily Search API 密钥,请导航至 https://app.tavily.com/home
然后,转到 /[root]/src/app 并创建一个名为 的文件夹 api。在该 api 文件夹中,创建一个名为 的文件夹 copilotkit。
在文件夹中 copilotkit ,创建一个名为的文件 research.ts。然后导航到此 research.ts gist 文件,复制代码并将其添加到 research.ts 文件中
现在,让我们 在文件夹route.ts 中 创建一个名为 的文件/[root]/src/app/api/copilotkit 。该文件将包含设置后端功能以处理 POST 请求的代码。它有条件地包含一个“研究”操作,该操作针对给定主题执行研究。
// Import the researchWithLangGraph function from the research module
import { researchWithLangGraph } from "./research";
// Import the Action type from the @copilotkit/shared package
import { Action } from "@copilotkit/shared";
// Import the NextRequest type from the next/server module
import { NextRequest } from "next/server";
// Import required modules and classes from the @copilotkit/runtime package
import {
  CopilotRuntime,
  copilotRuntimeNextJSAppRouterEndpoint,
  OpenAIAdapter,
} from "@copilotkit/runtime";

// Define the researchAction object with type Action<any>
const researchAction: Action<any> = {
  name: "research", // Name of the action
  description:
    "Call this function to research on a certain topic. Respect other notes about when to call this function", // Description of the action
  parameters: [
    {
      name: "topic", // Name of the parameter
      type: "string", // Type of the parameter, which is a string
      description: "The topic to research. 5 characters or longer.", // Description of the parameter
    },
  ],
  // Define the handler function for the action, which is asynchronous
  handler: async ({ topic }) => {
    console.log("Researching topic: ", topic); // Log the topic being researched
    return await researchWithLangGraph(topic); // Call the researchWithLangGraph function with the topic and return the result
  },
};

// Define the POST function to handle POST requests
export const POST = async (req: NextRequest) => {
  const actions: Action<any>[] = []; // Initialize an empty array to hold actions

  // Check if the TAVILY_API_KEY environment variable is set and not equal to "NONE"
  if (
    process.env["TAVILY_API_KEY"] &&
    process.env["TAVILY_API_KEY"] !== "NONE"
  ) {
    actions.push(researchAction); // Add the researchAction to the actions array
  }

  const openaiModel = process.env["OPENAI_MODEL"]; // Get the OpenAI model from the environment variable

  // Destructure the handleRequest function from the copilotRuntimeNextJSAppRouterEndpoint function
  const { handleRequest } = copilotRuntimeNextJSAppRouterEndpoint({
    runtime: new CopilotRuntime({ actions }), // Create a new CopilotRuntime instance with the actions
    serviceAdapter: new OpenAIAdapter({ model: openaiModel }), // Create a new OpenAIAdapter instance with the model
    endpoint: req.nextUrl.pathname, // Set the endpoint to the current request URL path
  });

  return handleRequest(req); // Call the handleRequest function with the request and return the result
};
如何制定旅行计划
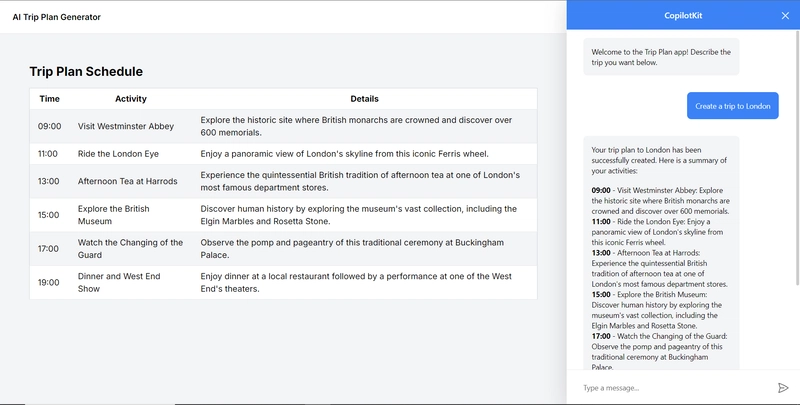
现在转到您之前集成的应用内聊天机器人,并向其发出提示,例如“创建一次伦敦之旅”。
生成完成后,您应该会看到创建的行程计划,如下所示。
恭喜!您已完成本教程的项目。
总结
CopilotKit 是一款功能强大的工具,可让您在几分钟内将 AI Copilot 添加到您的产品中。无论您对 AI 聊天机器人和助手感兴趣,还是对复杂任务的自动化感兴趣,CopilotKit 都能让您轻松实现。
如果您需要构建 AI 产品或将 AI 工具集成到您的软件应用程序中,您应该考虑 CopilotKit。
您可以在 GitHub 上找到本教程的源代码
文章来源:https://dev.to/copilotkit/the-ai-powered-trip-planner-you-cant-live-without-2pk6 后端开发教程 - Java、Spring Boot 实战 - msg200.com


