使用 Socket.io 和 React 构建聊天应用
查看Postiz - 开源社交媒体调度工具。
这篇文章是关于什么的?
我们都接触过网络聊天,比如 Facebook、Instagram、Whatsapp 等等。
简单来说,你给某个人或某个群组发消息,他们看到后会回复。简单又复杂。
要开发聊天应用,你需要在收到新消息时立即收到通知。
通常,要从服务器获取信息,你需要发送 HTTP 请求。使用 WebSocket,服务器会在有新信息时自动通知你,而无需你主动询问。
在本文中,我们将利用 Socket.io 提供的实时通信功能创建一个开放式聊天应用程序,该应用程序允许用户在应用程序上发送和接收来自多个用户的消息。您还将学习如何检测在线用户以及用户何时输入内容。
💡 要阅读本文,您需要具备 React.js 和 Node.js 的基本知识才能理解本文。

什么是 Socket.io?
Socket.io是一个流行的 JavaScript 库,它允许我们在 Web 浏览器和 Node.js 服务器之间创建实时的双向通信。它是一个高性能且可靠的库,经过优化,能够以最小的延迟处理大量数据。它遵循 WebSocket 协议,并提供更强大的功能,例如回退到 HTTP 长轮询或自动重新连接,这使我们能够构建高效的聊天和实时应用程序。
Novu——第一个开源通知基础设施
简单介绍一下我们。Novu 是第一个开源通知基础设施。我们主要负责管理所有产品通知。通知可以是应用内通知(类似 Facebook 的铃铛图标 - Websockets)、电子邮件、短信等等。
如果您能给我们一个 star,我将非常高兴!也请在评论区告诉我❤️
https://github.com/novuhq/novu

如何通过 Socket.io 将 React.js 应用连接到 Node.js
在本节中,我们将为聊天应用程序设置项目环境。您还将学习如何将 Socket.io 添加到 React 和 Node.js 应用程序中,以及如何通过 Socket.io 连接两个开发服务器以实现实时通信。
创建包含两个名为客户端和服务器的子文件夹的项目文件夹。
mkdir chat-app
cd chat-app
mkdir client server
通过终端导航到客户端文件夹并创建一个新的 React.js 项目。
cd client
npx create-react-app ./
安装 Socket.io 客户端 API 和 React Router。React Router 是一个 JavaScript 库,它使我们能够在 React 应用程序中的页面之间导航。
npm install socket.io-client react-router-dom
从 React 应用中删除多余的文件(例如徽标和测试文件),并更新App.js文件以显示如下所示的 Hello World。
function App() {
  return (
    <div>
      <p>Hello World!</p>
    </div>
  );
}
接下来,导航到服务器文件夹并创建一个package.json文件。
cd server
npm init -y
安装 Express.js、CORS、Nodemon 和 Socket.io 服务器 API。
Express.js是一个快速、简约的框架,它提供了多种用于在 Node.js 中构建 Web 应用程序的功能。CORS 是一个 Node.js包,允许不同域之间进行通信。
Nodemon是一个 Node.js 工具,它在检测到文件更改后会自动重启服务器,而 Socket.io允许我们在服务器上配置实时连接。
npm install express cors nodemon socket.io
创建一个 index.js 文件 - Web 服务器的入口点。
touch index.js
使用 Express.js 设置一个简单的 Node.js 服务器。下面的代码片段会在浏览器中访问时返回一个 JSON 对象http://localhost:4000/api。
//index.js
const express = require('express');
const app = express();
const PORT = 4000;

app.get('/api', (req, res) => {
  res.json({
    message: 'Hello world',
  });
});

app.listen(PORT, () => {
  console.log(`Server listening on ${PORT}`);
});
导入 HTTP 和 CORS 库以允许客户端和服务器域之间进行数据传输。
const express = require('express');
const app = express();
const PORT = 4000;

//New imports
const http = require('http').Server(app);
const cors = require('cors');

app.use(cors());

app.get('/api', (req, res) => {
  res.json({
    message: 'Hello world',
  });
});

http.listen(PORT, () => {
  console.log(`Server listening on ${PORT}`);
});
接下来,将 Socket.io 添加到项目中,以创建实时连接。在app.get()代码块之前,复制以下代码。
//New imports
.....
const socketIO = require('socket.io')(http, {
    cors: {
        origin: "http://localhost:3000"
    }
});

//Add this before the app.get() block
socketIO.on('connection', (socket) => {
    console.log(`⚡: ${socket.id} user just connected!`);
    socket.on('disconnect', () => {
      console.log('🔥: A user disconnected');
    });
});
从上面的代码片段中,该socket.io("connection")函数与 React 应用程序建立连接,然后为每个套接字创建一个唯一的 ID,并在用户访问网页时将该 ID 记录到控制台。
当您刷新或关闭网页时,套接字会触发断开事件,表明用户已与套接字断开连接。
接下来,通过将启动命令添加到文件中的脚本列表中来配置 Nodemon package.json。下面的代码片段使用 Nodemon 启动服务器。
//In server/package.json

"scripts": {
    "test": "echo \"Error: no test specified\" && exit 1",
    "start": "nodemon index.js"
  },
您现在可以使用以下命令通过 Nodemon 运行服务器。
npm start
打开客户端文件夹中的 App.js 文件并将 React 应用程序连接到 Socket.io 服务器。
import socketIO from 'socket.io-client';
const socket = socketIO.connect('http://localhost:4000');

function App() {
  return (
    <div>
      <p>Hello World!</p>
    </div>
  );
}
启动 React.js 服务器。
npm start
检查服务器运行的终端;React.js 客户端的 ID 出现在终端中。
恭喜🥂,React 应用程序已成功通过 Socket.io 连接到服务器。
💡 在本文的剩余部分,我将指导您创建聊天应用程序的网页,并在 React 应用和 Node.js 服务器之间来回发送消息。我还将指导您如何在新消息到达时添加自动滚动功能,以及如何在聊天应用程序中获取活跃用户。
创建聊天应用程序的主页
在本节中,我们将创建聊天应用程序的主页,该主页接受用户名并将其保存到本地存储以供识别。
在文件夹中创建一个名为 components 的文件夹client/src。然后,创建主页组件。
cd src
mkdir components & cd components
touch Home.js
将以下代码复制到Home.js文件中。该代码片段显示一个表单输入,该输入接受用户名并将其存储在本地存储中。
import React, { useState } from 'react';
import { useNavigate } from 'react-router-dom';

const Home = () => {
  const navigate = useNavigate();
  const [userName, setUserName] = useState('');

  const handleSubmit = (e) => {
    e.preventDefault();
    localStorage.setItem('userName', userName);
    navigate('/chat');
  };
  return (
    <form className="home__container" onSubmit={handleSubmit}>
      <h2 className="home__header">Sign in to Open Chat</h2>
      <label htmlFor="username">Username</label>
      <input
        type="text"
        minLength={6}
        name="username"
        id="username"
        className="username__input"
        value={userName}
        onChange={(e) => setUserName(e.target.value)}
      />
      <button className="home__cta">SIGN IN</button>
    </form>
  );
};

export default Home;
接下来,配置 React Router 以启用聊天应用程序页面之间的导航。对于此应用程序来说,主页和聊天页面就足够了。
将下面的代码复制到src/App.js文件中。
import { BrowserRouter, Routes, Route } from 'react-router-dom';
import Home from './components/Home';
import ChatPage from './components/ChatPage';
import socketIO from 'socket.io-client';

const socket = socketIO.connect('http://localhost:4000');
function App() {
  return (
    <BrowserRouter>
      <div>
        <Routes>
          <Route path="/" element={<Home socket={socket} />}></Route>
          <Route path="/chat" element={<ChatPage socket={socket} />}></Route>
        </Routes>
      </div>
    </BrowserRouter>
  );
}

export default App;
该代码片段使用 React Router v6 为应用程序的主页和聊天页面分配了不同的路由,并将 Socket.io 库传递给组件。我们将在下一节中创建聊天页面。
导航到 src/index.css文件并复制以下代码。它包含设计此项目所需的所有 CSS。
@import url('https://fonts.googleapis.com/css2?family=Poppins:wght@100;200;300;400;500;600;700;800;900&display=swap');

* {
  box-sizing: border-box;
  margin: 0;
  padding: 0;
  font-family: 'Poppins', sans-serif;
}
.home__container {
  width: 100%;
  height: 100vh;
  display: flex;
  flex-direction: column;
  justify-content: center;
  align-items: center;
}
.home__container > * {
  margin-bottom: 10px;
}
.home__header {
  margin-bottom: 30px;
}
.username__input {
  padding: 10px;
  width: 50%;
}
.home__cta {
  width: 200px;
  padding: 10px;
  font-size: 16px;
  cursor: pointer;
  background-color: #607eaa;
  color: #f9f5eb;
  outline: none;
  border: none;
  border-radius: 5px;
}
.chat {
  width: 100%;
  height: 100vh;
  display: flex;
  align-items: center;
}
.chat__sidebar {
  height: 100%;
  background-color: #f9f5eb;
  flex: 0.2;
  padding: 20px;
  border-right: 1px solid #fdfdfd;
}
.chat__main {
  height: 100%;
  flex: 0.8;
}
.chat__header {
  margin: 30px 0 20px 0;
}
.chat__users > * {
  margin-bottom: 10px;
  color: #607eaa;
  font-size: 14px;
}
.online__users > * {
  margin-bottom: 10px;
  color: rgb(238, 102, 102);
  font-style: italic;
}
.chat__mainHeader {
  width: 100%;
  height: 10vh;
  display: flex;
  align-items: center;
  justify-content: space-between;
  padding: 20px;
  background-color: #f9f5eb;
}
.leaveChat__btn {
  padding: 10px;
  width: 150px;
  border: none;
  outline: none;
  background-color: #d1512d;
  cursor: pointer;
  color: #eae3d2;
}
.message__container {
  width: 100%;
  height: 80vh;
  background-color: #fff;
  padding: 20px;
  overflow-y: scroll;
}

.message__container > * {
  margin-bottom: 10px;
}
.chat__footer {
  padding: 10px;
  background-color: #f9f5eb;
  height: 10vh;
}
.form {
  width: 100%;
  height: 100%;
  display: flex;
  align-items: center;
  justify-content: space-between;
}
.message {
  width: 80%;
  height: 100%;
  border-radius: 10px;
  border: 1px solid #ddd;
  outline: none;
  padding: 15px;
}
.sendBtn {
  width: 150px;
  background-color: green;
  padding: 10px;
  border: none;
  outline: none;
  color: #eae3d2;
  cursor: pointer;
}
.sendBtn:hover {
  background-color: rgb(129, 201, 129);
}
.message__recipient {
  background-color: #f5ccc2;
  width: 300px;
  padding: 10px;
  border-radius: 10px;
  font-size: 15px;
}
.message__sender {
  background-color: rgb(194, 243, 194);
  max-width: 300px;
  padding: 10px;
  border-radius: 10px;
  margin-left: auto;
  font-size: 15px;
}
.message__chats > p {
  font-size: 13px;
}
.sender__name {
  text-align: right;
}
.message__status {
  position: fixed;
  bottom: 50px;
  font-size: 13px;
  font-style: italic;
}
我们已经创建了聊天应用程序的主页。接下来,让我们设计聊天页面的用户界面。
创建应用程序的聊天页面
在本节中,我们将创建允许我们发送消息和查看活跃用户的聊天界面。

从上图可以看出,聊天页面分为三个部分,聊天栏 - 显示活跃用户的侧边栏,包含已发送消息和标题的聊天正文,以及聊天页脚 - 消息框和发送按钮。
由于我们已经能够定义聊天页面的布局,您现在就可以创建设计的组件。
创建ChatPage.js文件并将以下代码复制到其中。您将需要 ChatBar、ChatBody 和 ChatFooter 组件。
import React from 'react';
import ChatBar from './ChatBar';
import ChatBody from './ChatBody';
import ChatFooter from './ChatFooter';

const ChatPage = ({ socket }) => {
  return (
    <div className="chat">
      <ChatBar />
      <div className="chat__main">
        <ChatBody />
        <ChatFooter />
      </div>
    </div>
  );
};

export default ChatPage;
聊天栏组件
将下面的代码复制到ChatBar.js文件中。
import React from 'react';

const ChatBar = () => {
  return (
    <div className="chat__sidebar">
      <h2>Open Chat</h2>

      <div>
        <h4 className="chat__header">ACTIVE USERS</h4>
        <div className="chat__users">
          <p>User 1</p>
          <p>User 2</p>
          <p>User 3</p>
          <p>User 4</p>
        </div>
      </div>
    </div>
  );
};

export default ChatBar;
聊天主体组件
在这里,我们将创建显示已发送消息和页面标题的界面。
import React from 'react';
import { useNavigate } from 'react-router-dom';

const ChatBody = () => {
  const navigate = useNavigate();

  const handleLeaveChat = () => {
    localStorage.removeItem('userName');
    navigate('/');
    window.location.reload();
  };

  return (
    <>
      <header className="chat__mainHeader">
        <p>Hangout with Colleagues</p>
        <button className="leaveChat__btn" onClick={handleLeaveChat}>
          LEAVE CHAT
        </button>
      </header>

      {/*This shows messages sent from you*/}
      <div className="message__container">
        <div className="message__chats">
          <p className="sender__name">You</p>
          <div className="message__sender">
            <p>Hello there</p>
          </div>
        </div>

        {/*This shows messages received by you*/}
        <div className="message__chats">
          <p>Other</p>
          <div className="message__recipient">
            <p>Hey, I'm good, you?</p>
          </div>
        </div>

        {/*This is triggered when a user is typing*/}
        <div className="message__status">
          <p>Someone is typing...</p>
        </div>
      </div>
    </>
  );
};

export default ChatBody;
聊天页脚组件
在这里,我们将在聊天页面底部创建输入框和发送按钮。提交表单后,消息和用户名将显示在控制台中。
import React, { useState } from 'react';

const ChatFooter = () => {
  const [message, setMessage] = useState('');

  const handleSendMessage = (e) => {
    e.preventDefault();
    console.log({ userName: localStorage.getItem('userName'), message });
    setMessage('');
  };
  return (
    <div className="chat__footer">
      <form className="form" onSubmit={handleSendMessage}>
        <input
          type="text"
          placeholder="Write message"
          className="message"
          value={message}
          onChange={(e) => setMessage(e.target.value)}
        />
        <button className="sendBtn">SEND</button>
      </form>
    </div>
  );
};

export default ChatFooter;
在 React 应用和 Socket.io 服务器之间发送消息
在本节中,你将学习如何通过 Socket.io 将消息从 React 应用发送到 Node.js 服务器,以及反向发送消息。为了将消息发送到服务器,我们需要将 Socket.io 库传递给 ChatFooter(发送消息的组件)。
更新ChatPage.js文件以将 Socket.io 库传递到ChatFooter组件中。
import React from 'react';
import ChatBar from './ChatBar';
import ChatBody from './ChatBody';
import ChatFooter from './ChatFooter';

const ChatPage = ({ socket }) => {
  return (
    <div className="chat">
      <ChatBar />
      <div className="chat__main">
        <ChatBody />
        <ChatFooter socket={socket} />
      </div>
    </div>
  );
};

export default ChatPage;
更新组件handleSendMessage中的函数ChatFooter以将消息发送到 Node.js 服务器。
import React, { useState } from 'react';

const ChatFooter = ({ socket }) => {
  const [message, setMessage] = useState('');

  const handleSendMessage = (e) => {
    e.preventDefault();
    if (message.trim() && localStorage.getItem('userName')) {
      socket.emit('message', {
        text: message,
        name: localStorage.getItem('userName'),
        id: `${socket.id}${Math.random()}`,
        socketID: socket.id,
      });
    }
    setMessage('');
  };
  return <div className="chat__footer">...</div>;
};

export default ChatFooter;
该handleSendMessage函数会检查文本字段是否为空以及用户名是否存在于本地存储(从主页登录)中,然后将包含用户输入、用户名、生成的消息 ID 和套接字或客户端 ID 的消息事件发送到 Node.js 服务器。
打开index.js服务器上的文件,更新 Socket.io 代码块以监听来自 React 应用程序客户端的消息事件,并将消息记录到服务器的终端。
socketIO.on('connection', (socket) => {
  console.log(`⚡: ${socket.id} user just connected!`);

  //Listens and logs the message to the console
  socket.on('message', (data) => {
    console.log(data);
  });

  socket.on('disconnect', () => {
    console.log('🔥: A user disconnected');
  });
});
我们已经能够在服务器上检索消息;因此,让我们将消息发送给所有连接的客户端。
socketIO.on('connection', (socket) => {
  console.log(`⚡: ${socket.id} user just connected!`);

  //sends the message to all the users on the server
  socket.on('message', (data) => {
    socketIO.emit('messageResponse', data);
  });

  socket.on('disconnect', () => {
    console.log('🔥: A user disconnected');
  });
});
更新ChatPage.js文件以监听来自服务器的消息并将其显示给所有用户。
import React, { useEffect, useState } from 'react';
import ChatBar from './ChatBar';
import ChatBody from './ChatBody';
import ChatFooter from './ChatFooter';

const ChatPage = ({ socket }) => {
  const [messages, setMessages] = useState([]);

  useEffect(() => {
    socket.on('messageResponse', (data) => setMessages([...messages, data]));
  }, [socket, messages]);

  return (
    <div className="chat">
      <ChatBar socket={socket} />
      <div className="chat__main">
        <ChatBody messages={messages} />
        <ChatFooter socket={socket} />
      </div>
    </div>
  );
};

export default ChatPage;
从上面的代码片段可以看出,Socket.io 监听通过事件发送的消息messageResponse,并将数据传播到 messages 数组中。消息数组被传递到ChatBody组件中,以便在 UI 上显示。
更新ChatBody.js文件以呈现消息数组中的数据。
import React from 'react';
import { useNavigate } from 'react-router-dom';

const ChatBody = ({ messages }) => {
  const navigate = useNavigate();

  const handleLeaveChat = () => {
    localStorage.removeItem('userName');
    navigate('/');
    window.location.reload();
  };

  return (
    <>
      <header className="chat__mainHeader">
        <p>Hangout with Colleagues</p>
        <button className="leaveChat__btn" onClick={handleLeaveChat}>
          LEAVE CHAT
        </button>
      </header>

      <div className="message__container">
        {messages.map((message) =>
          message.name === localStorage.getItem('userName') ? (
            <div className="message__chats" key={message.id}>
              <p className="sender__name">You</p>
              <div className="message__sender">
                <p>{message.text}</p>
              </div>
            </div>
          ) : (
            <div className="message__chats" key={message.id}>
              <p>{message.name}</p>
              <div className="message__recipient">
                <p>{message.text}</p>
              </div>
            </div>
          )
        )}

        <div className="message__status">
          <p>Someone is typing...</p>
        </div>
      </div>
    </>
  );
};

export default ChatBody;
上面的代码片段会根据消息是由您还是其他用户发送来显示相应的消息。绿色消息是您发送的,红色消息是其他用户发送的。
恭喜🥂,聊天应用程序现已正常运行。您可以打开多个标签页并互相发送消息。
如何从 Socket.io 获取活跃用户
在本节中,您将学习如何获取所有活跃用户并将其显示在聊天应用程序的聊天栏上。
打开src/Home.js并创建一个事件,用于监听用户登录。更新handleSubmit函数如下:
import React, { useState } from 'react';
import { useNavigate } from 'react-router-dom';

const Home = ({ socket }) => {
  const navigate = useNavigate();
  const [userName, setUserName] = useState('');

  const handleSubmit = (e) => {
    e.preventDefault();
    localStorage.setItem('userName', userName);
    //sends the username and socket ID to the Node.js server
    socket.emit('newUser', { userName, socketID: socket.id });
    navigate('/chat');
  };
  return (...)
  ...
创建一个事件监听器,每当用户加入或离开聊天应用程序时,该监听器就会更新 Node.js 服务器上的用户数组。
let users = [];

socketIO.on('connection', (socket) => {
  console.log(`⚡: ${socket.id} user just connected!`);
  socket.on('message', (data) => {
    socketIO.emit('messageResponse', data);
  });

  //Listens when a new user joins the server
  socket.on('newUser', (data) => {
    //Adds the new user to the list of users
    users.push(data);
    // console.log(users);
    //Sends the list of users to the client
    socketIO.emit('newUserResponse', users);
  });

  socket.on('disconnect', () => {
    console.log('🔥: A user disconnected');
    //Updates the list of users when a user disconnects from the server
    users = users.filter((user) => user.socketID !== socket.id);
    // console.log(users);
    //Sends the list of users to the client
    socketIO.emit('newUserResponse', users);
    socket.disconnect();
  });
});
socket.on("newUser")当新用户加入聊天应用程序时触发。用户的详细信息(套接字 ID 和用户名)将保存到users数组中,并通过名为 的新事件发送回 React 应用newUserResponse。
在 中socket.io("disconnect"),users当用户离开聊天应用程序时,数组会更新,并newUserReponse触发 事件将更新后的用户列表发送到客户端。
接下来,让我们更新用户界面ChatBar.js,以显示活跃用户列表。
import React, { useState, useEffect } from 'react';

const ChatBar = ({ socket }) => {
  const [users, setUsers] = useState([]);

  useEffect(() => {
    socket.on('newUserResponse', (data) => setUsers(data));
  }, [socket, users]);

  return (
    <div className="chat__sidebar">
      <h2>Open Chat</h2>
      <div>
        <h4 className="chat__header">ACTIVE USERS</h4>
        <div className="chat__users">
          {users.map((user) => (
            <p key={user.socketID}>{user.userName}</p>
          ))}
        </div>
      </div>
    </div>
  );
};

export default ChatBar;
useEffect 钩子监听 Node.js 服务器发送的响应,并收集活跃用户列表。该列表被映射到视图中并实时更新。
恭喜💃🏻,我们已经能够从 Socket.io 获取活跃用户列表。接下来,让我们学习如何为聊天应用添加一些酷炫的功能。
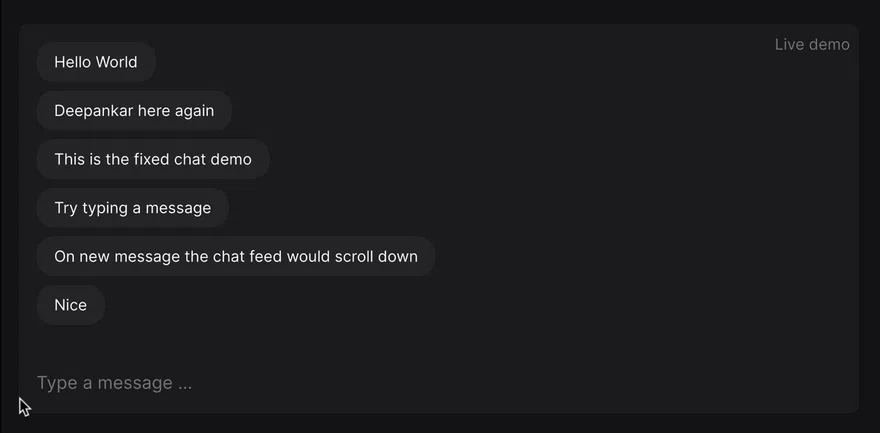
可选:当用户输入时自动滚动并通知用户
在本节中,您将了解如何添加收到新消息时的自动滚动功能以及指示用户正在输入的输入功能。
自动滚动功能
更新ChatPage.js文件如下:
import React, { useEffect, useState, useRef } from 'react';
import ChatBar from './ChatBar';
import ChatBody from './ChatBody';
import ChatFooter from './ChatFooter';

const ChatPage = ({ socket }) => {
  const [messages, setMessages] = useState([]);
  const [typingStatus, setTypingStatus] = useState('');
  const lastMessageRef = useRef(null);

  useEffect(() => {
    socket.on('messageResponse', (data) => setMessages([...messages, data]));
  }, [socket, messages]);

  useEffect(() => {
    // 👇️ scroll to bottom every time messages change
    lastMessageRef.current?.scrollIntoView({ behavior: 'smooth' });
  }, [messages]);

  return (
    <div className="chat">
      <ChatBar socket={socket} />
      <div className="chat__main">
        <ChatBody messages={messages} lastMessageRef={lastMessageRef} />
        <ChatFooter socket={socket} />
      </div>
    </div>
  );
};

export default ChatPage;
更新ChatBody组件以包含 的元素lastMessageRef。
import React from 'react';
import { useNavigate } from 'react-router-dom';

const ChatBody = ({ messages, lastMessageRef }) => {
  const navigate = useNavigate();

  const handleLeaveChat = () => {
    localStorage.removeItem('userName');
    navigate('/');
    window.location.reload();
  };

  return (
    <>
      <div>
        ......
        {/* --- At the bottom of the JSX element ----*/}
        <div ref={lastMessageRef} />
      </div>
    </>
  );
};

export default ChatBody;
从上面的代码片段可以看出,lastMessageRef它被附加到消息底部的 div 标签上,并且它的 useEffect 只有一个依赖项,即 messages 数组。因此,当消息发生变化时,useEffect 会lastMessageRef重新渲染。
当用户输入时通知其他人
为了在用户输入时通知用户,我们将onKeyDown在输入字段上使用 JavaScript 事件监听器,它将触发一个向 Socket.io 发送消息的函数,如下所示:
import React, { useState } from 'react';

const ChatFooter = ({ socket }) => {
  const [message, setMessage] = useState('');

  const handleTyping = () =>
    socket.emit('typing', `${localStorage.getItem('userName')} is typing`);

  const handleSendMessage = (e) => {
    e.preventDefault();
    if (message.trim() && localStorage.getItem('userName')) {
      socket.emit('message', {
        text: message,
        name: localStorage.getItem('userName'),
        id: `${socket.id}${Math.random()}`,
        socketID: socket.id,
      });
    }
    setMessage('');
  };
  return (
    <div className="chat__footer">
      <form className="form" onSubmit={handleSendMessage}>
        <input
          type="text"
          placeholder="Write message"
          className="message"
          value={message}
          onChange={(e) => setMessage(e.target.value)}
                    {/*OnKeyDown function*/}
          onKeyDown={handleTyping}
        />
        <button className="sendBtn">SEND</button>
      </form>
    </div>
  );
};

export default ChatFooter;
从上面的代码片段可以看出,每当用户在文本字段中输入内容时,该handleTyping函数都会触发事件。然后,我们可以在服务器上监听输入事件,并通过另一个名为 的事件将包含数据的响应发送给其他用户。typingtypingResponse
socketIO.on('connection', (socket) => {
  // console.log(`⚡: ${socket.id} user just connected!`);
  // socket.on('message', (data) => {
  //   socketIO.emit('messageResponse', data);
  // });

  socket.on('typing', (data) => socket.broadcast.emit('typingResponse', data));

  // socket.on('newUser', (data) => {
  //   users.push(data);
  //   socketIO.emit('newUserResponse', users);
  // });

  // socket.on('disconnect', () => {
  //   console.log('🔥: A user disconnected');
  //   users = users.filter((user) => user.socketID !== socket.id);
  //   socketIO.emit('newUserResponse', users);
  //   socket.disconnect();
  // });
});
接下来在ChatPage.js文件中监听事件,typingResponse并将数据传入ChatBody.js文件中进行显示。
import React, { useEffect, useState, useRef } from 'react';
import ChatBar from './ChatBar';
import ChatBody from './ChatBody';
import ChatFooter from './ChatFooter';

const ChatPage = ({ socket }) => {
  // const [messages, setMessages] = useState([]);
  // const [typingStatus, setTypingStatus] = useState('');
  // const lastMessageRef = useRef(null);

  // useEffect(() => {
  //   socket.on('messageResponse', (data) => setMessages([...messages, data]));
  // }, [socket, messages]);

  // useEffect(() => {
  //   // 👇️ scroll to bottom every time messages change
  //   lastMessageRef.current?.scrollIntoView({ behavior: 'smooth' });
  // }, [messages]);

  useEffect(() => {
    socket.on('typingResponse', (data) => setTypingStatus(data));
  }, [socket]);

  return (
    <div className="chat">
      <ChatBar socket={socket} />
      <div className="chat__main">
        <ChatBody
          messages={messages}
          typingStatus={typingStatus}
          lastMessageRef={lastMessageRef}
        />
        <ChatFooter socket={socket} />
      </div>
    </div>
  );
};

export default ChatPage;
更新ChatBody.js文件以向用户显示打字状态。
<div className="message__status">
  <p>{typingStatus}</p>
</div>
恭喜,您刚刚创建了一个聊天应用程序!💃🏻
通过添加 Socket.io 私人消息功能,用户可以随意改进应用程序,该功能允许用户创建 私人聊天室 和 直接消息,使用身份验证库进行用户授权和身份验证,并使用实时数据库进行存储。
结论
Socket.io 是一款功能强大的工具,它通过在 Web 浏览器和 Node.js 服务器之间建立持久连接,使我们能够构建高效的实时应用程序,如体育博彩网站、拍卖和外汇交易应用程序,当然还有聊天应用程序。
如果您希望在 Node.js 中构建聊天应用程序,Socket.io 可能是一个很好的选择。
您可以在此处找到本教程的源代码:https://github.com/novuhq/blog/tree/main/open-chat-app-with-socketIO
下一篇文章
在本系列的下一部分中,我将讨论将聊天应用程序连接到浏览器通知(网络推送),以便您可以在用户离线时通知他们有关新消息的信息。
帮帮我!
如果您觉得这篇文章帮助您更好地理解了 WebSocket!请给我们一个 Star,我会非常高兴!也请在评论区告诉我❤️
https://github.com/novuhq/novu

感谢您的阅读!
文章来源:https://dev.to/novu/building-a-chat-app-with-socketio-and-react-2edj