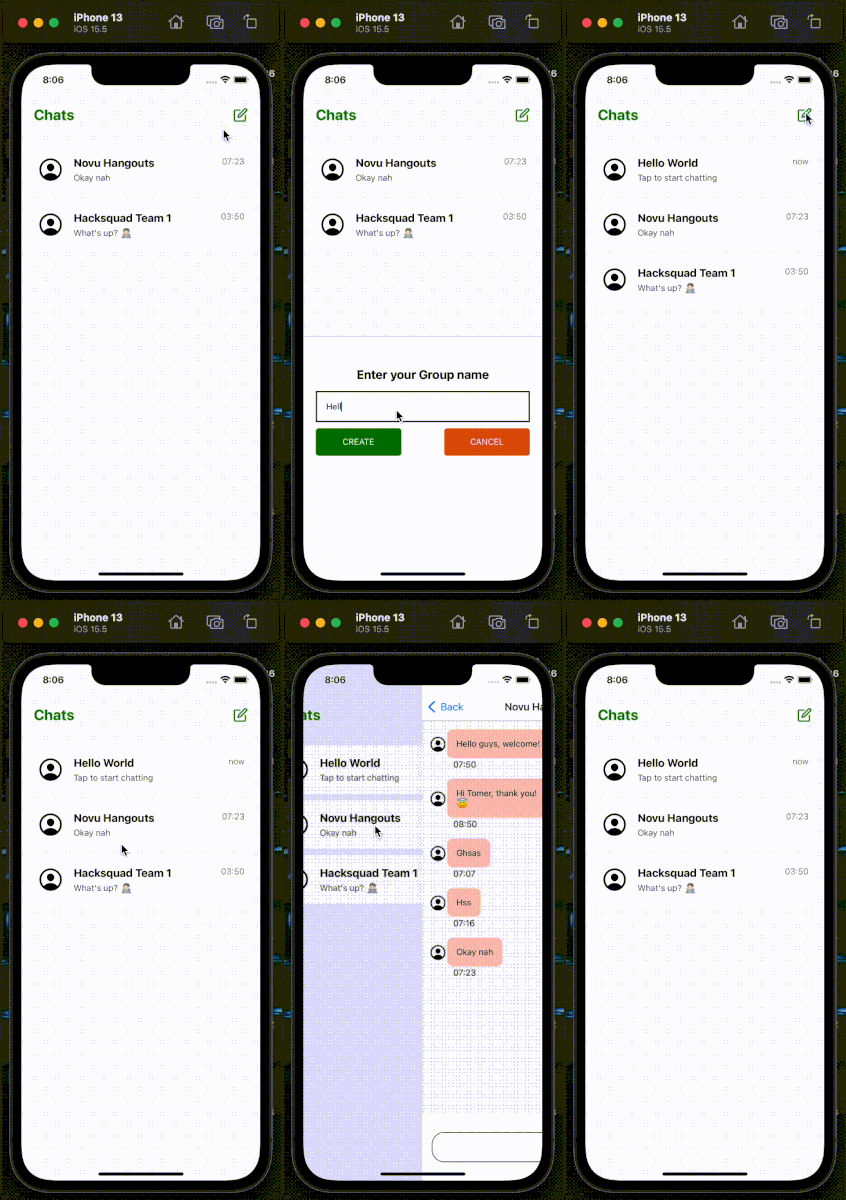
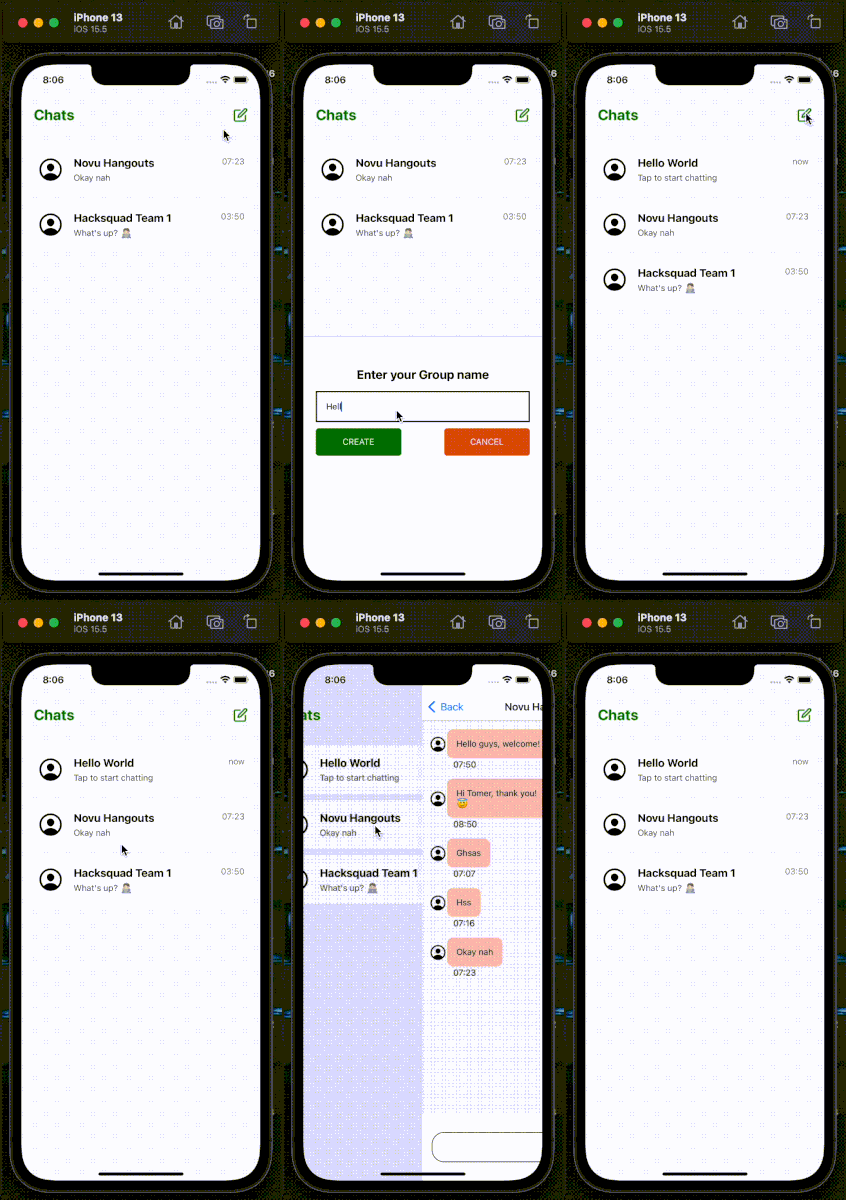
使用 Socket.io 和 React Native 构建聊天应用程序🤯
查看Postiz - 开源社交媒体调度工具。
我之前写过关于如何使用 React 构建聊天应用程序的文章,它获得了 1660 个赞和 52955 次浏览量🤩
所以我决定为 React Native 制作另一个。
这篇文章是关于什么的?
聊天无处不在,从 Whatsapp 到 Facebook 和 Instagram,几乎每个平台都提供某种形式的聊天。
在当今的数字世界里,我们都已经离不开移动设备了!就在写这篇文章之前,我在Whatsapp上给一位朋友发了一条消息。
聊天很有趣,你给一个人或一个群组发消息,他们看到后会回复。简单却又复杂。
要开发一个聊天应用,你需要在收到新消息时立即收到通知。
在本文中,我们将做一些与之前的 React 教程略有不同的事情。我们将创建一个登录屏幕,您可以在其中输入您的姓名,创建可供人们加入的群组,并在群组成员之间显示实时消息。
从服务器获取实时信息ℹ️
有两种方法可以从服务器获取有关新出价的实时信息:
使用长轮询 HTTP 请求,基本上每 5 - 10 秒发送一次 HTTP 请求来获取有关新出价的信息。
当新的出价到达时,使用开放套接字(Websockets)直接从服务器获取信息。
在本文中,我将讨论Websockets,特别是 Node.js 库 - Socket.io
Socket.io是一个流行的 JavaScript 库,它允许我们在软件应用程序和 Node.js 服务器之间创建实时、双向通信。
Novu——第一个开源通知基础设施
简单介绍一下我们。Novu 是第一个开源通知基础设施。我们主要负责管理所有产品通知。通知可以是应用内通知(类似于开发者社区的Websockets中的铃铛图标)、电子邮件、短信等等。
如果你能给我们一颗星,我会非常高兴!这会帮助我每周写更多文章🚀
https://github.com/novuhq/novu

我们在 Hacktoberfest 期间送出一些超棒的礼物 😇
如何在 React Native 和 Socket.io 之间创建实时连接
在本教程中,我们将使用Expo构建聊天应用程序 - Expo 是一个开源框架,使我们能够通过编写 React 和 JavaScript 代码为 IOS 和 Android 创建原生应用程序。
安装 Expo
Expo使我们免于使用React Native CLI 创建本机应用程序所需的复杂配置 ,使其成为构建和发布 React Native 应用程序最简单、最快捷的方式。
确保你 的计算机上安装了Expo CLI、 Node.js和 Git 。然后,通过运行以下代码创建项目文件夹和 Expo React Native 应用。
mkdir chat-app
cd chat-app
expo init app
Expo 允许我们使用托管工作流或裸工作流创建原生应用程序。在本教程中,我们将使用空白的托管工作流,因为所有必要的配置都已完成。
? Choose a template: › - Use arrow-keys. Return to submit.
    ----- Managed workflow -----
❯   blank               a minimal app as clean as an empty canvas
    blank (TypeScript)  same as blank but with TypeScript configuration
    tabs (TypeScript)   several example screens and tabs using react-navigation and TypeScript
    ----- Bare workflow -----
    minimal             bare and minimal, just the essentials to get you started
将 Socket.io 客户端 API 安装到 React Native 应用程序。
cd app
expo install socket.io-client
socket.js在文件夹中创建一个utils并将以下代码复制到文件中
mkdir utils
touch socket.js
//👇🏻 Paste within socket.js file
并添加
import { io } from "socket.io-client";
const socket = io.connect("http://localhost:4000");
export default socket;
上面的代码片段创建了与该 URL 托管的服务器的实时连接。(我们将在接下来的部分中创建服务器)。
在文件夹中创建一个styles.js文件utils,并将以下代码复制到该文件中。它包含聊天应用程序的所有样式。
import { StyleSheet } from "react-native";

export const styles = StyleSheet.create({
    loginscreen: {
        flex: 1,
        backgroundColor: "#EEF1FF",
        alignItems: "center",
        justifyContent: "center",
        padding: 12,
        width: "100%",
    },
    loginheading: {
        fontSize: 26,
        marginBottom: 10,
    },
    logininputContainer: {
        width: "100%",
        alignItems: "center",
        justifyContent: "center",
    },
    logininput: {
        borderWidth: 1,
        width: "90%",
        padding: 8,
        borderRadius: 2,
    },
    loginbutton: {
        backgroundColor: "green",
        padding: 12,
        marginVertical: 10,
        width: "60%",
        borderRadius: "50%",
        elevation: 1,
    },
    loginbuttonText: {
        textAlign: "center",
        color: "#fff",
        fontWeight: "600",
    },
    chatscreen: {
        backgroundColor: "#F7F7F7",
        flex: 1,
        padding: 10,
        position: "relative",
    },
    chatheading: {
        fontSize: 24,
        fontWeight: "bold",
        color: "green",
    },
    chattopContainer: {
        backgroundColor: "#F7F7F7",
        height: 70,
        width: "100%",
        padding: 20,
        justifyContent: "center",
        marginBottom: 15,
        elevation: 2,
    },
    chatheader: {
        flexDirection: "row",
        alignItems: "center",
        justifyContent: "space-between",
    },
    chatlistContainer: {
        paddingHorizontal: 10,
    },
    chatemptyContainer: {
        width: "100%",
        height: "80%",
        alignItems: "center",
        justifyContent: "center",
    },
    chatemptyText: { fontWeight: "bold", fontSize: 24, paddingBottom: 30 },
    messagingscreen: {
        flex: 1,
    },
    messaginginputContainer: {
        width: "100%",
        minHeight: 100,
        backgroundColor: "white",
        paddingVertical: 30,
        paddingHorizontal: 15,
        justifyContent: "center",
        flexDirection: "row",
    },
    messaginginput: {
        borderWidth: 1,
        padding: 15,
        flex: 1,
        marginRight: 10,
        borderRadius: 20,
    },
    messagingbuttonContainer: {
        width: "30%",
        backgroundColor: "green",
        borderRadius: 3,
        alignItems: "center",
        justifyContent: "center",
        borderRadius: 50,
    },
    modalbutton: {
        width: "40%",
        height: 45,
        backgroundColor: "green",
        borderRadius: 5,
        alignItems: "center",
        justifyContent: "center",
        color: "#fff",
    },
    modalbuttonContainer: {
        flexDirection: "row",
        justifyContent: "space-between",
        marginTop: 10,
    },
    modaltext: {
        color: "#fff",
    },
    modalContainer: {
        width: "100%",
        borderTopColor: "#ddd",
        borderTopWidth: 1,
        elevation: 1,
        height: 400,
        backgroundColor: "#fff",
        position: "absolute",
        bottom: 0,
        zIndex: 10,
        paddingVertical: 50,
        paddingHorizontal: 20,
    },
    modalinput: {
        borderWidth: 2,
        padding: 15,
    },
    modalsubheading: {
        fontSize: 20,
        fontWeight: "bold",
        marginBottom: 15,
        textAlign: "center",
    },
    mmessageWrapper: {
        width: "100%",
        alignItems: "flex-start",
        marginBottom: 15,
    },
    mmessage: {
        maxWidth: "50%",
        backgroundColor: "#f5ccc2",
        padding: 15,
        borderRadius: 10,
        marginBottom: 2,
    },
    mvatar: {
        marginRight: 5,
    },
    cchat: {
        width: "100%",
        flexDirection: "row",
        alignItems: "center",
        borderRadius: 5,
        paddingHorizontal: 15,
        backgroundColor: "#fff",
        height: 80,
        marginBottom: 10,
    },
    cavatar: {
        marginRight: 15,
    },
    cusername: {
        fontSize: 18,
        marginBottom: 5,
        fontWeight: "bold",
    },
    cmessage: {
        fontSize: 14,
        opacity: 0.7,
    },
    crightContainer: {
        flexDirection: "row",
        justifyContent: "space-between",
        flex: 1,
    },
    ctime: {
        opacity: 0.5,
    },
});
安装 React Navigation 及其依赖项。React Navigation 允许我们在 React Native 应用程序中从一个屏幕导航到另一个屏幕。
npm install @react-navigation/native
npx expo install react-native-screens react-native-safe-area-context
设置 Socket.io Node.js 服务器
在这里,我将指导您创建 Socket.io Node.js 服务器,以便与 React Native 应用程序进行实时通信。
server在项目文件夹中创建一个文件夹。
cd chat-app
mkdir server
导航到服务器文件夹并创建一个package.json文件。
cd server & npm init -y
安装 Express.js、CORS、Nodemon 和 Socket.io 服务器 API。
npm install express cors nodemon socket.io
Express.js 是一个快速、简约的框架,它提供了多种用于在 Node.js 中构建 Web 应用程序的功能。CORS 是一个 Node.js包 ,允许不同域之间进行通信。
Nodemon 是一个 Node.js 工具,它在检测到文件更改后会自动重启服务器,而 Socket.io 允许我们在服务器上配置实时连接。
创建一个index.js文件 - Node.js 服务器的入口点。
touch index.js
使用 Express.js 设置一个简单的 Node.js 服务器。下面的代码片段会在浏览器中访问时返回一个 JSON 对象http://localhost:4000/api。
//👇🏻 index.js
const express = require("express");
const app = express();
const PORT = 4000;

app.use(express.urlencoded({ extended: true }));
app.use(express.json());

app.get("/api", (req, res) => {
    res.json({
        message: "Hello world",
    });
});

app.listen(PORT, () => {
    console.log(`Server listening on ${PORT}`);
});
导入 HTTP 和 CORS 库以允许客户端和服务器域之间进行数据传输。
const express = require("express");
const app = express();
const PORT = 4000;

app.use(express.urlencoded({ extended: true }));
app.use(express.json());

//👇🏻 New imports
const http = require("http").Server(app);
const cors = require("cors");

app.use(cors());

app.get("/api", (req, res) => {
    res.json({
        message: "Hello world",
    });
});

http.listen(PORT, () => {
    console.log(`Server listening on ${PORT}`);
});
接下来,将 Socket.io 添加到项目中,以创建实时连接。在app.get()代码块之前,复制以下代码:
//👇🏻 New imports
.....
const socketIO = require('socket.io')(http, {
    cors: {
        origin: "<http://localhost:3000>"
    }
});

//👇🏻 Add this before the app.get() block
socketIO.on('connection', (socket) => {
    console.log(`⚡: ${socket.id} user just connected!`);

    socket.on('disconnect', () => {
      socket.disconnect()
      console.log('🔥: A user disconnected');
    });
});
从上面的代码片段中,该socket.io("connection")函数与 React 应用程序建立连接,然后为每个套接字创建一个唯一的 ID,并在刷新应用程序时将该 ID 记录到控制台。
当您刷新或关闭应用程序时,套接字会触发断开事件,表明用户已与套接字断开连接。
通过将启动命令添加到package.json文件中的脚本列表中来配置 Nodemon。下面的代码片段使用 Nodemon 启动服务器。
//👇🏻 In server/package.json

"scripts": {
    "test": "echo \\"Error: no test specified\\" && exit 1",
    "start": "nodemon index.js"
  },
您现在可以使用以下命令通过 Nodemon 运行服务器。
npm start
构建用户界面
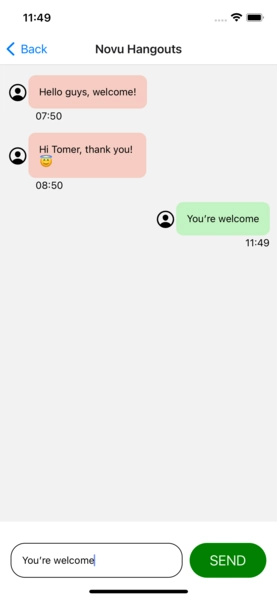
在这里,我们将创建聊天应用程序的用户界面,以便用户登录、创建聊天室和发送消息。该应用程序分为三个屏幕 - 登录屏幕、聊天屏幕和消息屏幕。
首先,让我们设置 React Navigation。
在应用程序文件夹中创建一个screens文件夹,添加登录、聊天和消息组件并"Hello World"在其中呈现文本。
mkdir screens
touch Login.js Chat.js Messaging.js
将以下代码复制到App.js应用程序文件夹内的文件中。
import React from "react";

//👇🏻 app screens
import Login from "./screens/Login";
import Messaging from "./screens/Messaging";
import Chat from "./screens/Chat";

//👇🏻 React Navigation configurations
import { NavigationContainer } from "@react-navigation/native";
import { createNativeStackNavigator } from "@react-navigation/native-stack";

const Stack = createNativeStackNavigator();

export default function App() {
    return (
        <NavigationContainer>
            <Stack.Navigator>
                <Stack.Screen
                    name='Login'
                    component={Login}
                    options={{ headerShown: false }}
                />

                <Stack.Screen
                    name='Chat'
                    component={Chat}
                    options={{
                        title: "Chats",
                        headerShown: false,
                    }}
                />
                <Stack.Screen name='Messaging' component={Messaging} />
            </Stack.Navigator>
        </NavigationContainer>
    );
}
登录屏幕
将下面的代码复制到Login.js文件中。
import React, { useState } from "react";
import {
    Text,
    SafeAreaView,
    View,
    TextInput,
    Pressable,
    Alert,
} from "react-native";

//👇🏻 Import the app styles
import { styles } from "../utils/styles";

const Login = ({ navigation }) => {
    const [username, setUsername] = useState("");

    //👇🏻 checks if the input field is empty
    const handleSignIn = () => {
        if (username.trim()) {
            //👇🏻 Logs the username to the console
            console.log({ username });
        } else {
            Alert.alert("Username is required.");
        }
    };

    return (
        <SafeAreaView style={styles.loginscreen}>
            <View style={styles.loginscreen}>
                <Text style={styles.loginheading}>Sign in</Text>
                <View style={styles.logininputContainer}>
                    <TextInput
                        autoCorrect={false}
                        placeholder='Enter your username'
                        style={styles.logininput}
                        onChangeText={(value) => setUsername(value)}
                    />
                </View>

                <Pressable onPress={handleSignIn} style={styles.loginbutton}>
                    <View>
                        <Text style={styles.loginbuttonText}>Get Started</Text>
                    </View>
                </Pressable>
            </View>
        </SafeAreaView>
    );
};

export default Login;
代码片段接受用户的用户名并将其记录在控制台上。
让我们更新代码并使用 异步存储保存用户名,这样用户就不需要在每次启动应用程序时登录。
💡 *Async Storage 是一个 React Native 包,用于在原生应用中存储字符串数据。它类似于 Web 上的本地存储,可用于存储 token 和各种字符串格式的数据。*
运行以下代码来安装异步存储
expo install @react-native-async-storage/async-storage
更新handleSignIn通过 AsyncStorage 保存用户名的功能。
import AsyncStorage from "@react-native-async-storage/async-storage";

const storeUsername = async () => {
        try {
            //👇🏻 async function - saves the username to AsyncStorage
            //   redirecting to the Chat page
            await AsyncStorage.setItem("username", username);
            navigation.navigate("Chat");
        } catch (e) {
            Alert.alert("Error! While saving username");
        }
    };

    const handleSignIn = () => {
        if (username.trim()) {
            //👇🏻 calls AsyncStorage function
            storeUsername();
        } else {
            Alert.alert("Username is required.");
        }
    };
聊天室
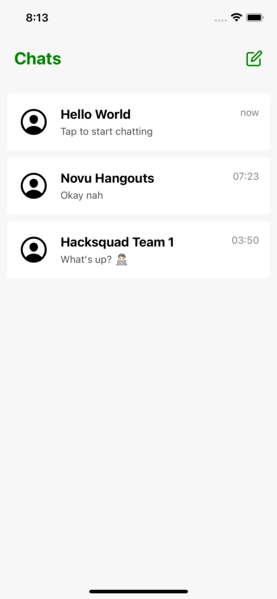
在这里,我们将更新屏幕的用户界面Chat以显示可用的聊天室,允许用户创建一个聊天室,并Messaging在选择每个聊天室时导航到屏幕。
将下面的代码复制到Chat.js文件中。
import React from "react";
import { View, Text, Pressable, SafeAreaView, FlatList } from "react-native";
import { Feather } from "@expo/vector-icons";
import ChatComponent from "../component/ChatComponent";
import { styles } from "../utils/styles";
const Chat = () => {
//👇🏻 Dummy list of rooms
const rooms = [
{
id: "1",
name: "Novu Hangouts",
messages: [
{
id: "1a",
text: "Hello guys, welcome!",
time: "07:50",
user: "Tomer",
},
{
id: "1b",
text: "Hi Tomer, thank you! 😇",
time: "08:50",
user: "David",
},
],
},
{
id: "2",
name: "Hacksquad Team 1",
messages: [
{
id: "2a",
text: "Guys, who's awake? 🙏🏽",
time: "12:50",
user: "Team Leader",
},
{
id: "2b",
text: "What's up? 🧑🏻💻",
time: "03:50",
user: "Victoria",
},
],
},
];
return (
<SafeAreaView style={styles.chatscreen}>
<View style={styles.chattopContainer}>
<View style={styles.chatheader}>
<Text style={styles.chatheading}>Chats</Text>
{/* 👇🏻 Logs "ButtonPressed" to the console when the icon is clicked */}
<Pressable onPress={() => console.log("Button Pressed!")}>
<Feather name='edit' size={24} color='green' />
</Pressable>
</View>
</View>
<View style={styles.chatlistContainer}>
{rooms.length > 0 ? (
<FlatList
data={rooms}
renderItem={({ item }) => <ChatComponent item={item} />}
keyExtractor={(item) => item.id}
/>
) : (
<View style={styles.chatemptyContainer}>
<Text style={styles.chatemptyText}>No rooms created!</Text>
<Text>Click the icon above to create a Chat room</Text>
</View>
)}
</View>
</SafeAreaView>
);
};
export default Chat;
- 从上面的代码片段来看:
- 我创建了一个虚拟的房间列表,然后通过 FlatList将它们渲染 到
ChatComponent。(尚未创建) - 由于房间可以是空的也可以是有人的,因此条件语句决定要显示的组件。
- 我创建了一个虚拟的房间列表,然后通过 FlatList将它们渲染 到
接下来,在组件文件夹中创建ChatComponent。它代表每个聊天名称、时间、最后发送的消息的预览,并在用户Messaging点击时将用户重定向到该组件。
将下面的代码复制到components/ChatComponent.js文件中。
import { View, Text, Pressable } from "react-native";
import React, { useLayoutEffect, useState } from "react";
import { Ionicons } from "@expo/vector-icons";
import { useNavigation } from "@react-navigation/native";
import { styles } from "../utils/styles";

const ChatComponent = ({ item }) => {
    const navigation = useNavigation();
    const [messages, setMessages] = useState({});

    //👇🏻 Retrieves the last message in the array from the item prop
    useLayoutEffect(() => {
        setMessages(item.messages[item.messages.length - 1]);
    }, []);

    ///👇🏻 Navigates to the Messaging screen
    const handleNavigation = () => {
        navigation.navigate("Messaging", {
            id: item.id,
            name: item.name,
        });
    };

    return (
        <Pressable style={styles.cchat} onPress={handleNavigation}>
            <Ionicons
                name='person-circle-outline'
                size={45}
                color='black'
                style={styles.cavatar}
            />

            <View style={styles.crightContainer}>
                <View>
                    <Text style={styles.cusername}>{item.name}</Text>

                    <Text style={styles.cmessage}>
                        {messages?.text ? messages.text : "Tap to start chatting"}
                    </Text>
                </View>
                <View>
                    <Text style={styles.ctime}>
                        {messages?.time ? messages.time : "now"}
                    </Text>
                </View>
            </View>
        </Pressable>
    );
};

export default ChatComponent;
恭喜💃🏻!我们现在可以显示房间列表并将用户重定向到Messaging屏幕。
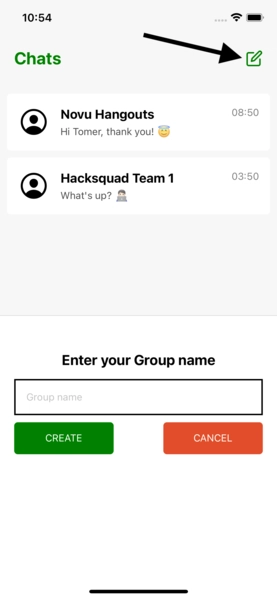
在我们继续之前,让我们创建一个自定义的 Modal 组件,当按下标题图标时,该组件允许用户创建一个新组(房间)。
在组件文件夹中创建一个Modal.js文件,将其导入聊天屏幕,并在按下标题图标时切换它。
import React from "react";
import { View, Text, Pressable, SafeAreaView, FlatList } from "react-native";
import { Feather } from "@expo/vector-icons";
import ChatComponent from "../component/ChatComponent";
import { styles } from "../utils/styles";

//👇🏻 The Modal component
import Modal from "../component/Modal";

const Chat = () => {
    const [visible, setVisible] = useState(false);

    //...other variables
    return (
        <SafeAreaView style={styles.chatscreen}>
            <View style={styles.chattopContainer}>
                <View style={styles.chatheader}>
                    <Text style={styles.chatheading}>Chats</Text>

                    {/* Displays the Modal component when clicked */}
                    <Pressable onPress={() => setVisible(true)}>
                        <Feather name='edit' size={24} color='green' />
                    </Pressable>
                </View>
            </View>

            <View style={styles.chatlistContainer}>...</View>
            {/*
                Pass setVisible as prop in order to toggle
                the display within the Modal component.
            */}
            {visible ? <Modal setVisible={setVisible} /> : ""}
        </SafeAreaView>
    );
};

export default Chat;
将下面的代码复制到Modal.js文件中。
import { View, Text, TextInput, Pressable } from "react-native";
import React, { useState } from "react";
import { styles } from "../utils/styles";

const Modal = ({ setVisible }) => {
    const [groupName, setGroupName] = useState("");

    //👇🏻 Function that closes the Modal component
    const closeModal = () => setVisible(false);

    //👇🏻 Logs the group name to the console
    const handleCreateRoom = () => {
        console.log({ groupName });
        closeModal();
    };
    return (
        <View style={styles.modalContainer}>
            <Text style={styles.modalsubheading}>Enter your Group name</Text>
            <TextInput
                style={styles.modalinput}
                placeholder='Group name'
                onChangeText={(value) => setGroupName(value)}
            />

            <View style={styles.modalbuttonContainer}>
                <Pressable style={styles.modalbutton} onPress={handleCreateRoom}>
                    <Text style={styles.modaltext}>CREATE</Text>
                </Pressable>
                <Pressable
                    style={[styles.modalbutton, { backgroundColor: "#E14D2A" }]}
                    onPress={closeModal}
                >
                    <Text style={styles.modaltext}>CANCEL</Text>
                </Pressable>
            </View>
        </View>
    );
};

export default Modal;
消息屏幕
将下面的代码复制到Messaging.js文件中。
import React, { useLayoutEffect, useState } from "react";
import { View, TextInput, Text, FlatList, Pressable } from "react-native";
import AsyncStorage from "@react-native-async-storage/async-storage";
import MessageComponent from "../component/MessageComponent";
import { styles } from "../utils/styles";

const Messaging = ({ route, navigation }) => {
    const [chatMessages, setChatMessages] = useState([
        {
            id: "1",
            text: "Hello guys, welcome!",
            time: "07:50",
            user: "Tomer",
        },
        {
            id: "2",
            text: "Hi Tomer, thank you! 😇",
            time: "08:50",
            user: "David",
        },
    ]);
    const [message, setMessage] = useState("");
    const [user, setUser] = useState("");

    //👇🏻 Access the chatroom's name and id
    const { name, id } = route.params;

//👇🏻 This function gets the username saved on AsyncStorage
    const getUsername = async () => {
        try {
            const value = await AsyncStorage.getItem("username");
            if (value !== null) {
                setUser(value);
            }
        } catch (e) {
            console.error("Error while loading username!");
        }
    };

    //👇🏻 Sets the header title to the name chatroom's name
    useLayoutEffect(() => {
        navigation.setOptions({ title: name });
        getUsername()
    }, []);

    /*👇🏻
        This function gets the time the user sends a message, then
        logs the username, message, and the timestamp to the console.
     */
    const handleNewMessage = () => {
        const hour =
            new Date().getHours() < 10
                ? `0${new Date().getHours()}`
                : `${new Date().getHours()}`;

        const mins =
            new Date().getMinutes() < 10
                ? `0${new Date().getMinutes()}`
                : `${new Date().getMinutes()}`;

        console.log({
            message,
            user,
            timestamp: { hour, mins },
        });
    };

    return (
        <View style={styles.messagingscreen}>
            <View
                style={[
                    styles.messagingscreen,
                    { paddingVertical: 15, paddingHorizontal: 10 },
                ]}
            >
                {chatMessages[0] ? (
                    <FlatList
                        data={chatMessages}
                        renderItem={({ item }) => (
                            <MessageComponent item={item} user={user} />
                        )}
                        keyExtractor={(item) => item.id}
                    />
                ) : (
                    ""
                )}
            </View>

            <View style={styles.messaginginputContainer}>
                <TextInput
                    style={styles.messaginginput}
                    onChangeText={(value) => setMessage(value)}
                />
                <Pressable
                    style={styles.messagingbuttonContainer}
                    onPress={handleNewMessage}
                >
                    <View>
                        <Text style={{ color: "#f2f0f1", fontSize: 20 }}>SEND</Text>
                    </View>
                </Pressable>
            </View>
        </View>
    );
};

export default Messaging;
上面的代码片段通过组件呈现每个聊天室中的消息MessageComponent。
创建MessageComponent文件并将以下代码复制到文件中:
import { View, Text } from "react-native";
import React from "react";
import { Ionicons } from "@expo/vector-icons";
import { styles } from "../utils/styles";

export default function MessageComponent({ item, user }) {
    const status = item.user !== user;

    return (
        <View>
            <View
                style={
                    status
                        ? styles.mmessageWrapper
                        : [styles.mmessageWrapper, { alignItems: "flex-end" }]
                }
            >
                <View style={{ flexDirection: "row", alignItems: "center" }}>
                    <Ionicons
                        name='person-circle-outline'
                        size={30}
                        color='black'
                        style={styles.mavatar}
                    />
                    <View
                        style={
                            status
                                ? styles.mmessage
                                : [styles.mmessage, { backgroundColor: "rgb(194, 243, 194)" }]
                        }
                    >
                        <Text>{item.text}</Text>
                    </View>
                </View>
                <Text style={{ marginLeft: 40 }}>{item.time}</Text>
            </View>
        </View>
    );
}
从上面的代码片段中,status变量检查消息上的用户键是否与当前用户相同,以确定如何对齐消息。
现在我们已经完成了应用程序的用户界面!🎊接下来,让我们学习如何与Socket.io服务器通信,创建聊天室,以及如何通过Socket.io实时发送消息。
在 React Native 中使用 Socket.io 创建聊天室
在本节中,我将指导您在 Socket.io 服务器上创建聊天室并在应用程序上显示它们。
更新Modal.js文件以便在我们创建新聊天室时向服务器发送消息。
import { View, Text, TextInput, Pressable } from "react-native";
import React, { useState } from "react";
import { styles } from "../utils/styles";

//👇🏻 Import socket from the socket.js file in utils folder
import socket from "../utils/socket";

const Modal = ({ setVisible }) => {
    const closeModal = () => setVisible(false);
    const [groupName, setGroupName] = useState("");

    const handleCreateRoom = () => {
        //👇🏻 sends a message containing the group name to the server
        socket.emit("createRoom", groupName);
        closeModal();
    };
    return (
        <View style={styles.modalContainer}>
            <Text style={styles.modalsubheading}>Enter your Group name</Text>
            <TextInput
                style={styles.modalinput}
                placeholder='Group name'
                onChangeText={(value) => setGroupName(value)}
            />
            <View style={styles.modalbuttonContainer}>
                {/* 👇🏻 The create button triggers the function*/}
                <Pressable style={styles.modalbutton} onPress={handleCreateRoom}>
                    <Text style={styles.modaltext}>CREATE</Text>
                </Pressable>

                <Pressable
                    style={[styles.modalbutton, { backgroundColor: "#E14D2A" }]}
                    onPress={closeModal}
                >
                    <Text style={styles.modaltext}>CANCEL</Text>
                </Pressable>
            </View>
        </View>
    );
};

export default Modal;
在后端服务器上创建一个监听器,将组名保存到数组中并返回整个列表。
//👇🏻 Generates random string as the ID
const generateID = () => Math.random().toString(36).substring(2, 10);

let chatRooms = [
    //👇🏻 Here is the data structure of each chatroom
    // {
    //  id: generateID(),
    //  name: "Novu Hangouts",
    //  messages: [
    //      {
    //          id: generateID(),
    //          text: "Hello guys, welcome!",
    //          time: "07:50",
    //          user: "Tomer",
    //      },
    //      {
    //          id: generateID(),
    //          text: "Hi Tomer, thank you! 😇",
    //          time: "08:50",
    //          user: "David",
    //      },
    //  ],
    // },
];

socketIO.on("connection", (socket) => {
    console.log(`⚡: ${socket.id} user just connected!`);

    socket.on("createRoom", (roomName) => {
        socket.join(roomName);
        //👇🏻 Adds the new group name to the chat rooms array
        chatRooms.unshift({ id: generateID(), roomName, messages: [] });
        //👇🏻 Returns the updated chat rooms via another event
        socket.emit("roomsList", chatRooms);
    });

    socket.on("disconnect", () => {
        socket.disconnect();
        console.log("🔥: A user disconnected");
    });
});
另外,通过以下 API 路由返回聊天室列表:
app.get("/api", (req, res) => {
    res.json(chatRooms);
});
更新文件以从服务器Chat.js获取和监听并显示聊天室。roomsList
const [rooms, setRooms] = useState([]);

//👇🏻 Runs when the component mounts
useLayoutEffect(() => {
    function fetchGroups() {
        fetch("http://localhost:4000/api")
            .then((res) => res.json())
            .then((data) => setRooms(data))
            .catch((err) => console.error(err));
    }
    fetchGroups();
}, []);

//👇🏻 Runs whenever there is new trigger from the backend
useEffect(() => {
    socket.on("roomsList", (rooms) => {
        setRooms(rooms);
    });
}, [socket]);
在 React Native 中通过 Socket.io 发送消息
在上一节中,我们创建了新的聊天室,并将其保存在服务器上的数组中,并在应用中显示它们。在这里,我们将通过向子数组添加新消息来更新聊天室消息。
如何显示聊天室消息
回想一下,每个聊天室的 ID 都会被传递到 Messaging 组件中。现在,让我们在屏幕加载时通过 Socket.io 将 ID 发送到服务器。
import React, { useEffect, useLayoutEffect, useState } from "react";
import { View, TextInput, Text, FlatList, Pressable } from "react-native";
import socket from "../utils/socket";
import MessageComponent from "../component/MessageComponent";
import { styles } from "../utils/styles";

const Messaging = ({ route, navigation }) => {
    //👇🏻 The id passed
    const { name, id } = route.params;

//...other functions

    useLayoutEffect(() => {
        navigation.setOptions({ title: name });

        //👇🏻 Sends the id to the server to fetch all its messages
        socket.emit("findRoom", id);
    }, []);

    return <View style={styles.messagingscreen}>...</View>;
};

export default Messaging;
在服务器上创建事件监听器。
socket.on("findRoom", (id) => {
    //👇🏻 Filters the array by the ID
    let result = chatRooms.filter((room) => room.id == id);
    //👇🏻 Sends the messages to the app
    socket.emit("foundRoom", result[0].messages);
});
接下来,监听foundRoom事件并向用户显示消息。
//👇🏻 This runs only initial mount
useLayoutEffect(() => {
    navigation.setOptions({ title: name });
    socket.emit("findRoom", id);
    socket.on("foundRoom", (roomChats) => setChatMessages(roomChats));
}, []);

//👇🏻 This runs when the messages are updated.
useEffect(() => {
    socket.on("foundRoom", (roomChats) => setChatMessages(roomChats));
}, [socket])
如何创建新消息
要创建新消息,我们需要更新handleNewMessage函数以将消息属性发送到服务器并将其添加到messages数组中。
const handleNewMessage = () => {
    const hour =
        new Date().getHours() < 10
            ? `0${new Date().getHours()}`
            : `${new Date().getHours()}`;

    const mins =
        new Date().getMinutes() < 10
            ? `0${new Date().getMinutes()}`
            : `${new Date().getMinutes()}`;

    socket.emit("newMessage", {
        message,
        room_id: id,
        user,
        timestamp: { hour, mins },
    });
};
监听服务器上的事件并更新chatRoom数组。
socket.on("newMessage", (data) => {
    //👇🏻 Destructures the property from the object
    const { room_id, message, user, timestamp } = data;

    //👇🏻 Finds the room where the message was sent
    let result = chatRooms.filter((room) => room.id == room_id);

    //👇🏻 Create the data structure for the message
    const newMessage = {
        id: generateID(),
        text: message,
        user,
        time: `${timestamp.hour}:${timestamp.mins}`,
    };
    //👇🏻 Updates the chatroom messages
    socket.to(result[0].name).emit("roomMessage", newMessage);
    result[0].messages.push(newMessage);

    //👇🏻 Trigger the events to reflect the new changes
    socket.emit("roomsList", chatRooms);
    socket.emit("foundRoom", result[0].messages);
});
结论
到目前为止,您已经学习了如何在 React Native 和 Node.js 应用程序中设置 Socket.io,使用异步存储保存数据以及如何通过 Socket.io 在服务器和 Expo 应用程序之间进行通信。
Socket.io 是一款出色的工具,具有出色的功能,使我们能够通过与 Node.js 服务器建立持久连接来构建高效的实时应用程序,如体育博彩网站、 拍卖和外汇交易应用程序,当然还有 聊天应用程序。
请随意通过以下方式改进应用程序:
- 添加身份验证
- 使用异步存储保存令牌
- 添加消息的实时数据库,以及
- 使用博览会通知包添加推送通知 。
本教程的源代码可以在这里找到:
https://github.com/novuhq/blog/tree/main/chat-app-reactnative-socketIO
感谢您的阅读!💃🏻
附言: Novu 将在 Hacktoberfest 上送出超棒的礼品!快来参加吧!如果您能给我们一颗星,我们会非常开心!⭐️
https://github.com/novuhq/novu
 后端开发教程 - Java、Spring Boot 实战 - msg200.com

